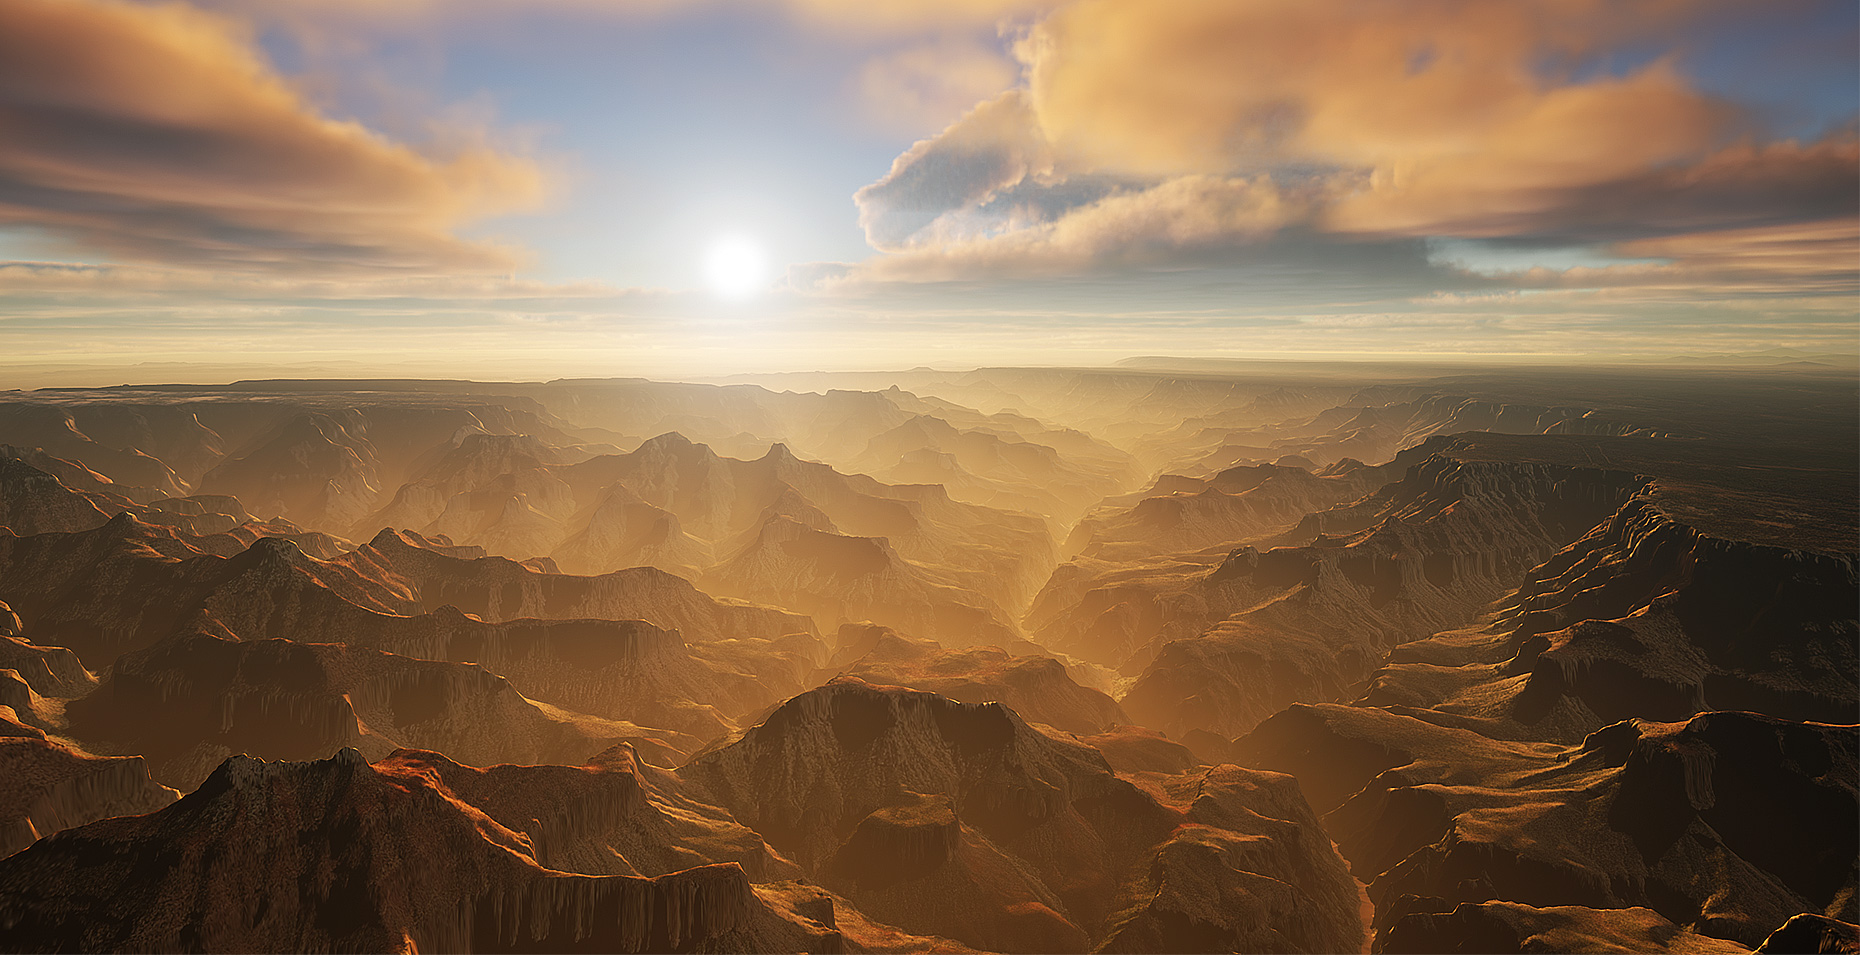
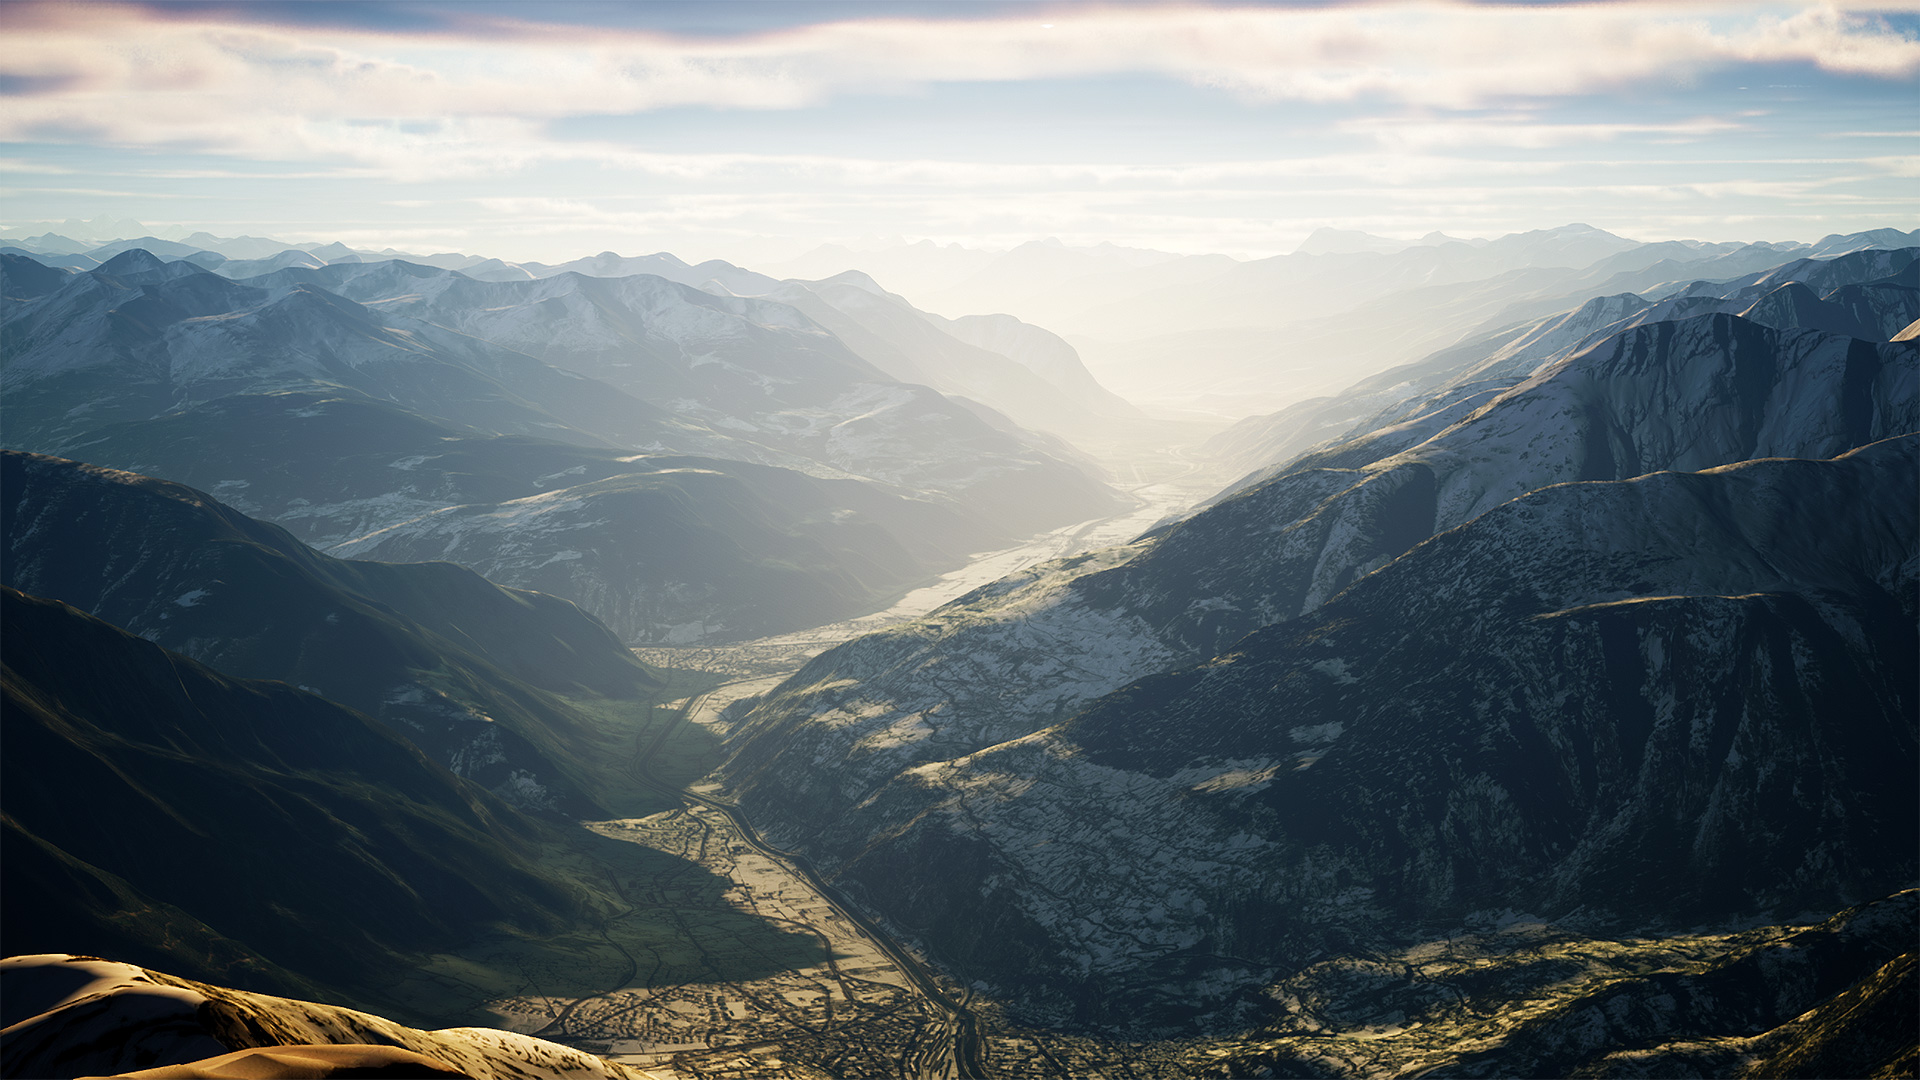
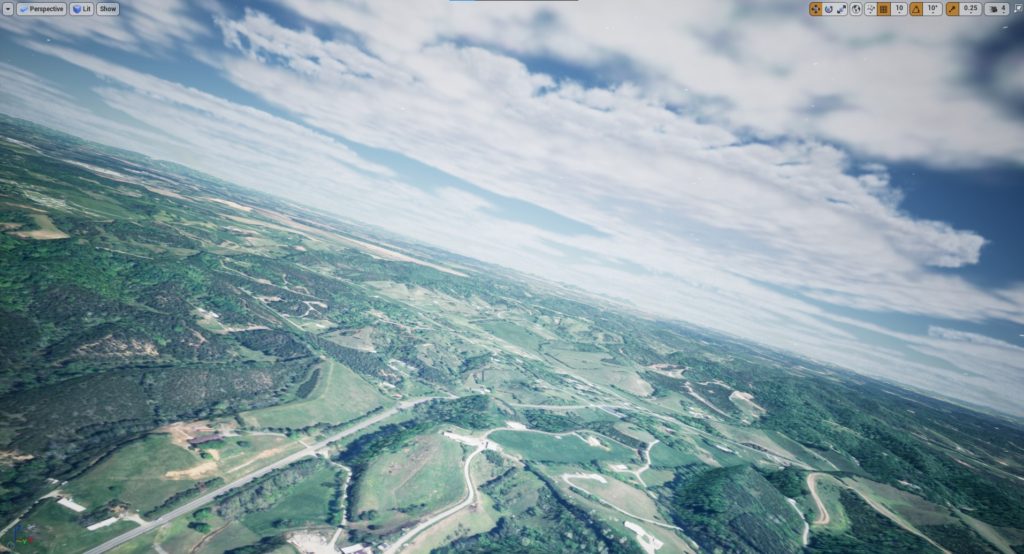
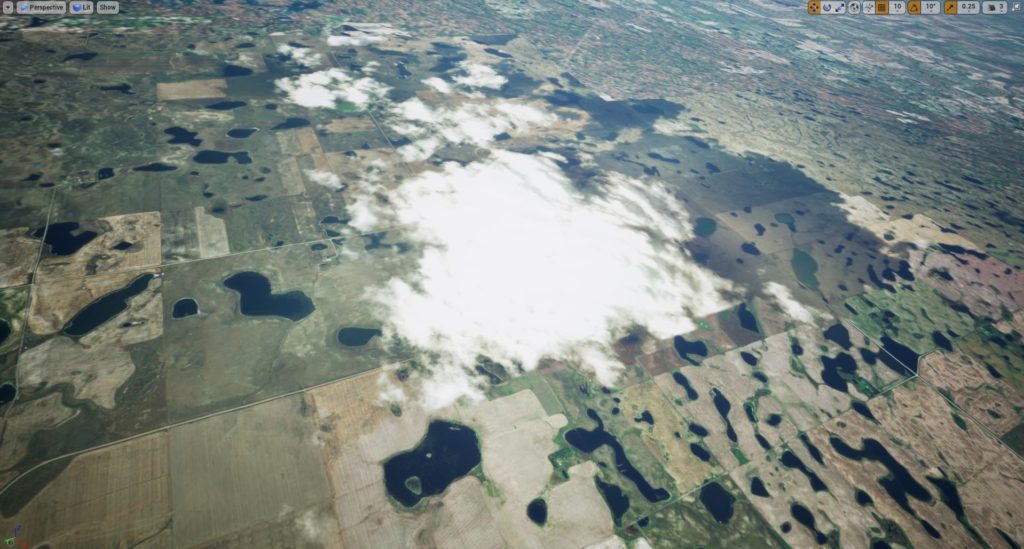
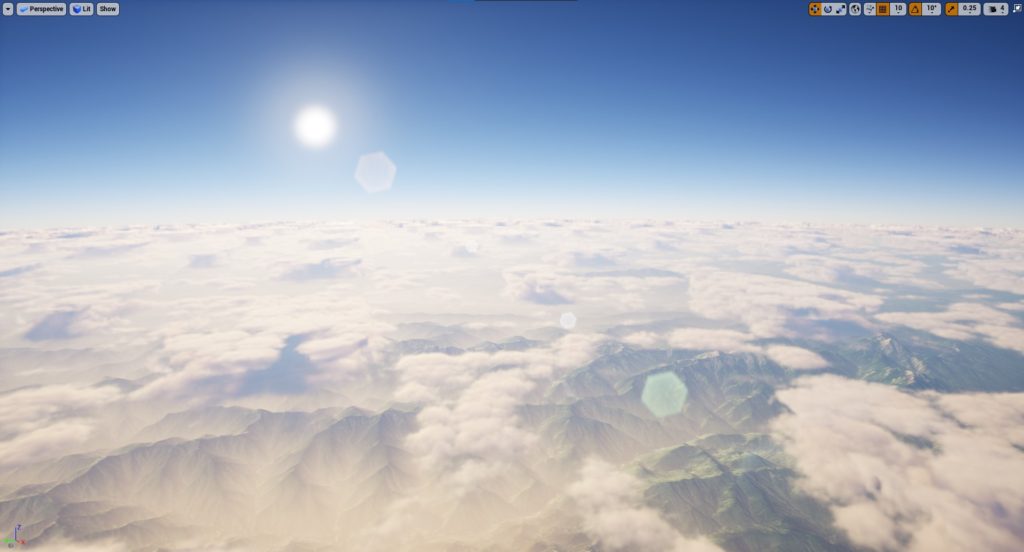
The Cesium for Unreal plugin recently became available for UE 4.26. I’m super excited on how this tool enables creators to stream 3D geospatial data of the entire Earth for virtual simulations. I experimented with a few locations to study how to set up lighting and volumetric clouds for these landscapes. Below are the in-engine screenshots. These are purely landscapes from the plugin, no rock or tree models added. I didn’t use Ray Tracing for now. ArtStation links here and here.
UPDATE (May 2023): This article was written back in 2021. Some of the information are outdated. As of today, the Cesium developers have added new sections in their documentation. I highly recommend reading them especially the Photorealistic 3D Tiles from Google Maps Platform.

Additionally, I made a Flight Simulator VR Prototype in another blog post using these landscapes. You can check it out.
Getting Started
For tutorials on how to add 3D geospatial data, you can go to the Cesium for Unreal Quickstart. You can also watch this Inside Unreal video where the folks from Cesium talked about the plugin. I recommend starting from the Cesium for Unreal Samples which includes levels showcasing landscapes, photogrammetry buildings and post-processing settings. The project settings in these samples are already modified which save you setup time.
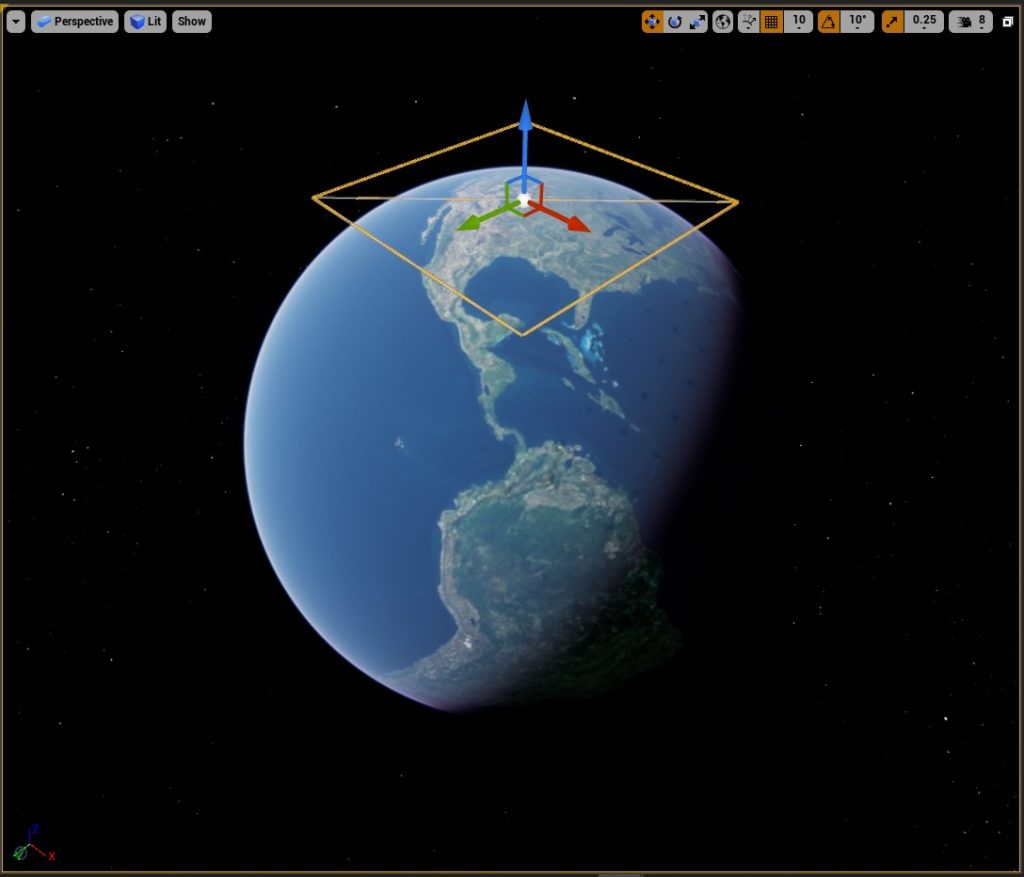
Once you’ve instantiated the Earth, go ahead and fly around. Use the CesiumGeoreference actor and choose a location. The world is your playground.
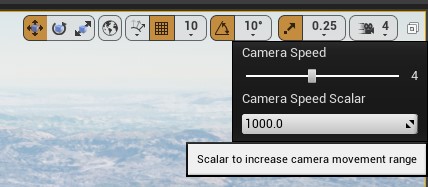
Here’s a helpful tip. While holding right-click and pressing WASD to move around the world, you can use the scroll wheel to instantly adjust the camera speed. This helps reduce the number of times you spend changing the values on the top-right corner of the viewport!
If however, you want to create a level from scratch and not use the sample levels, then don’t forget to enable these in your project settings:
Project Settings > Engine > Rendering > Default Settings > Extend default luminance range in Auto Exposure settings
Project Settings > Engine > Rendering > Shader Permutation Reduction > Support Sky Atmosphere Affecting Height Fog
CesiumWorldTerrain
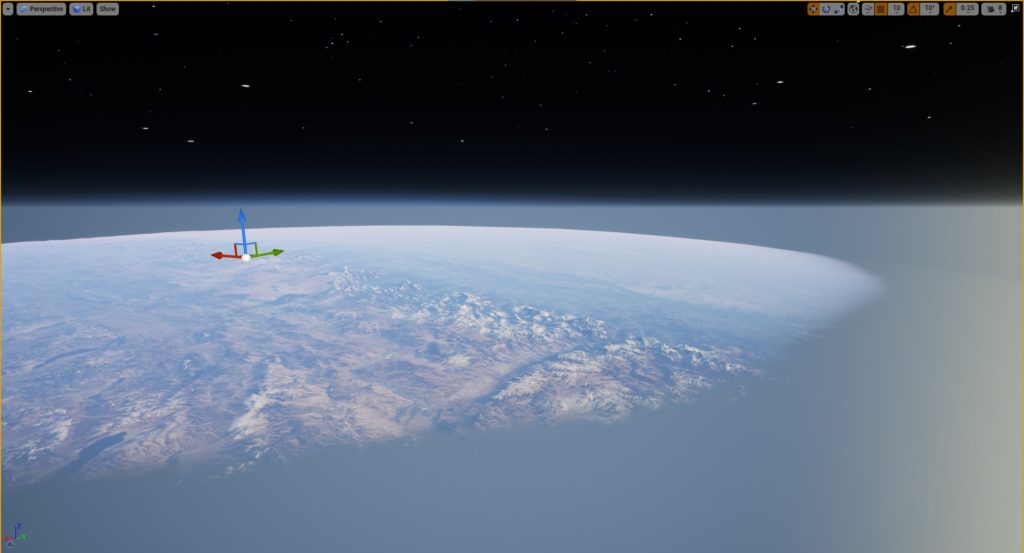
Because the Earth is a sphere (more accurately an oblate spheroid), you start seeing strange things once you go past 500km from the game world origin. The direction of gravity is no longer perpendicular to the ground. The farther you go from the game origin, the greater the discrepancy. The horizon starts to tilt.
Without updating the game world origin, this can introduce some strange visuals. The Exponential Height Fog, for instance, extends along a straight world. In certain high altitudes, the falloff and the cutoff distances can be visible.
A solution to this one is to set up a blueprint to gradually decrease the Fog Density to zero as your camera moves towards space.
In terms of the terrain’s texture, Cesium uses Bing Maps imagery. Why not Google Maps? Because of legal restrictions as answered in this forum post. The shadows on certain landscapes are baked into the texture. In some locations, even the clouds are baked as well. Moreover, the ocean is just a texture. When creating a level containing bodies of water, you need to figure out how to implement a mask and apply a water shader only on the oceans.
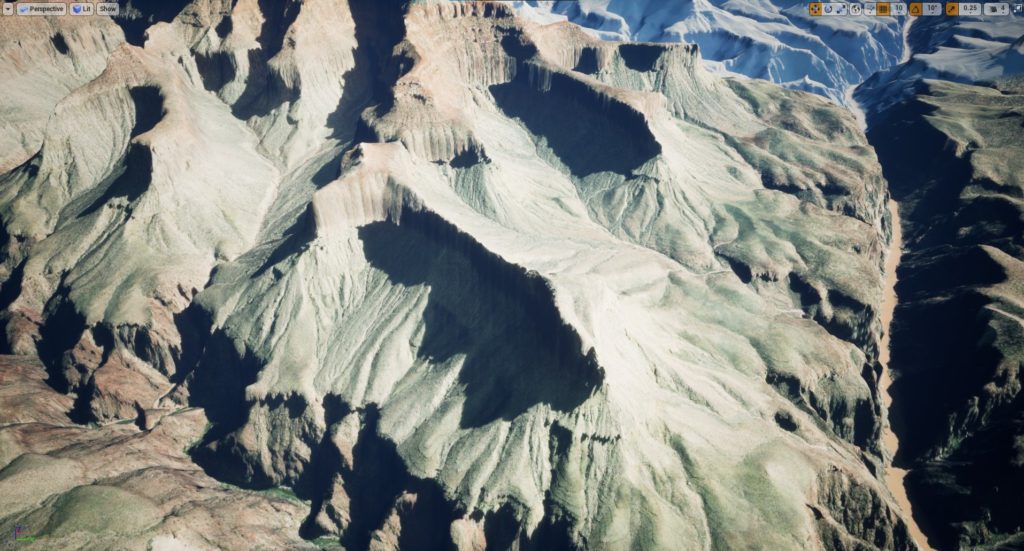
The Maximum Screen Space Error parameter controls how much highly-detailed landscape tiles show up on your camera. When taking a screenshot, you’ll want to lower this number and wait for the details to finish loading.

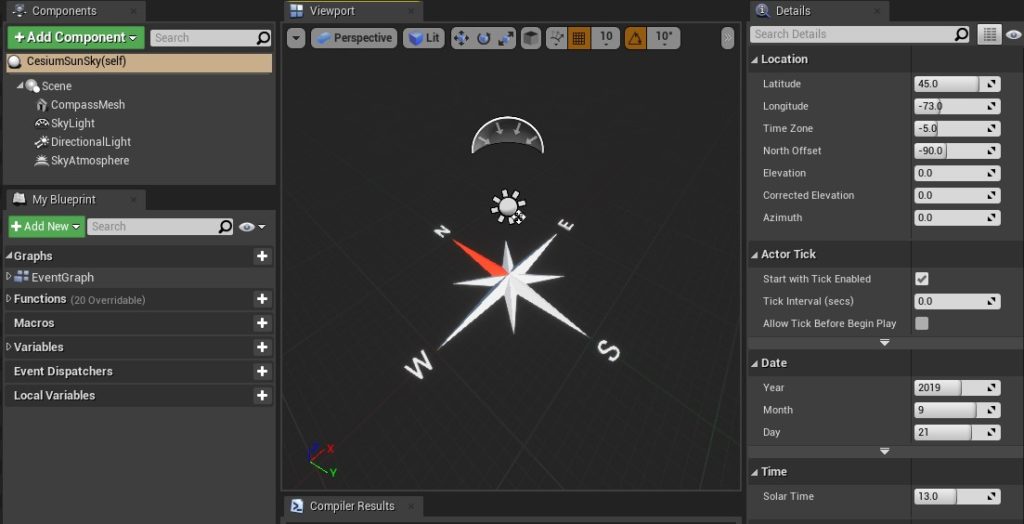
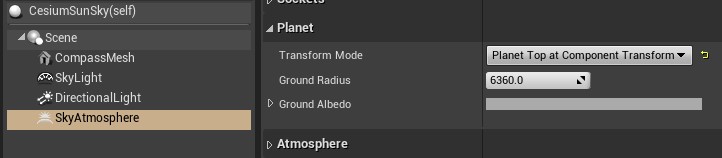
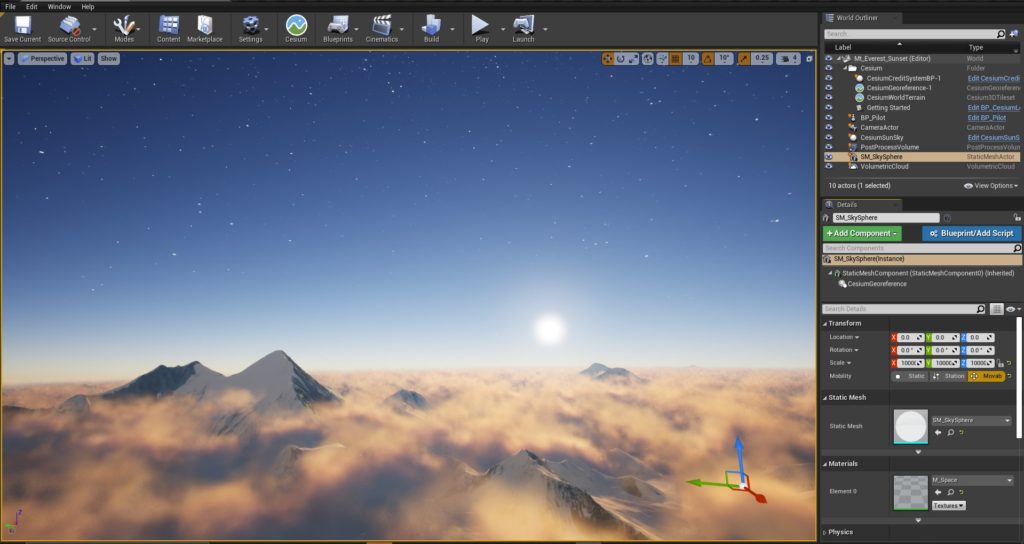
CesiumSunSky
The CesiumSunSky blueprint is a slightly modified version of the SunSky Actor from the Sun Position Calculator plugin. It contains the Skylight, Directional Light, and Sky Atmosphere. When you place this into your level, you almost don’t have to do anything else because the default settings are already great. All you need to take note here is that the blueprint variables affect only the rotation of the Directional Light. This means you can be creative and adjust the settings of the other components in case you need a very specific look.
All lights are set to Movable because baking lightmaps at this scale is impractical.
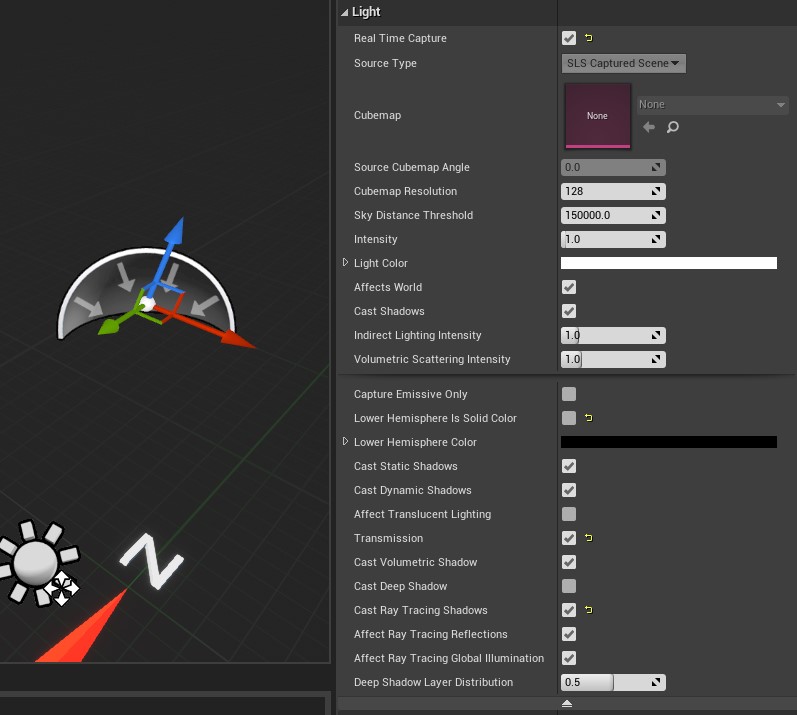
The Skylight has the Real Time Capture setting enabled. For day-and-night cycles, you’ll need this to allow dynamic diffuse and specular environment lighting. You might want to decrease Cubemap Resolution for performance reasons.
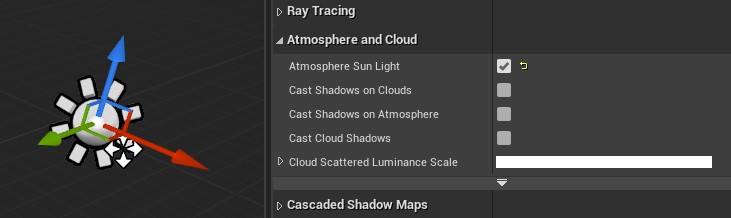
Directional Light is set to affect the Sky Atmosphere and clouds.
You’ll want to adjust the Dynamic Shadow Distance because shadows disappear after a certain distance from the camera. This is great for optimization, but is very noticeable when your camera is flying above landscapes.

If you plan to add more objects such as trees or buildings, you’ll notice that increasing the Dynamic Shadow Distance produces softer shadows. You need to adjust the Distribution Exponent to retain the hard shadows.
The Sky Atmosphere’s Transform Mode is set to Planet Top at Component Transform.
Sjoerd De Jong did awesome presentations on the Sky & Atmosphere system which you can watch here and more in-depth here. If you’re using Exponential Height Fog, change the Fog Inscattering Color and Directional Inscattering Color to black. If you don’t, then the fog and the atmosphere won’t blend very well.
For the background stars, I added a skybox which is basically an inverted sphere, scale set to a really huge number, with a material set to Additive Blend. You can download the 8K stars texture here.
There’s an alternative approach to adding stars by using post-processing and have them blend seamlessly with the time-of-day and camera location. Sjoerd explains it in this video.
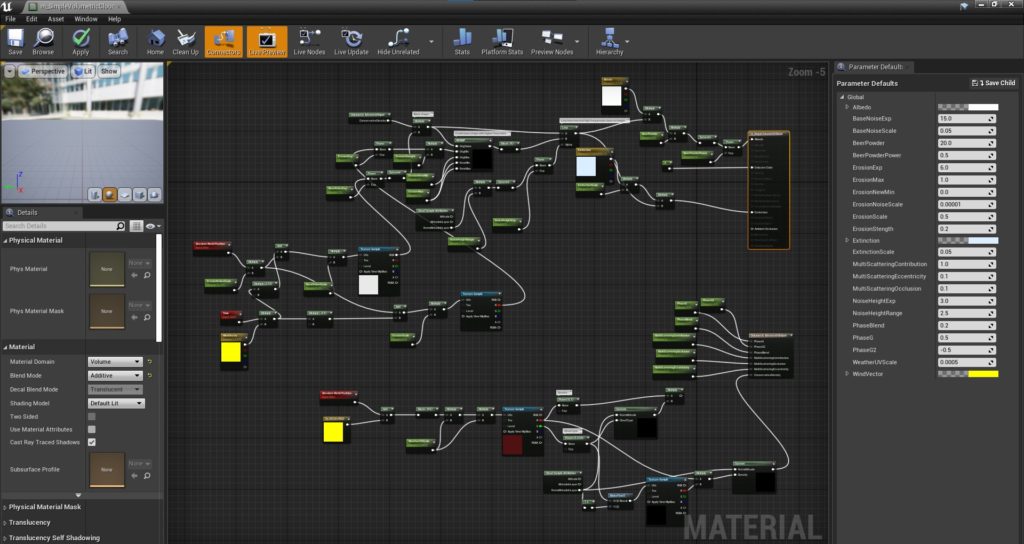
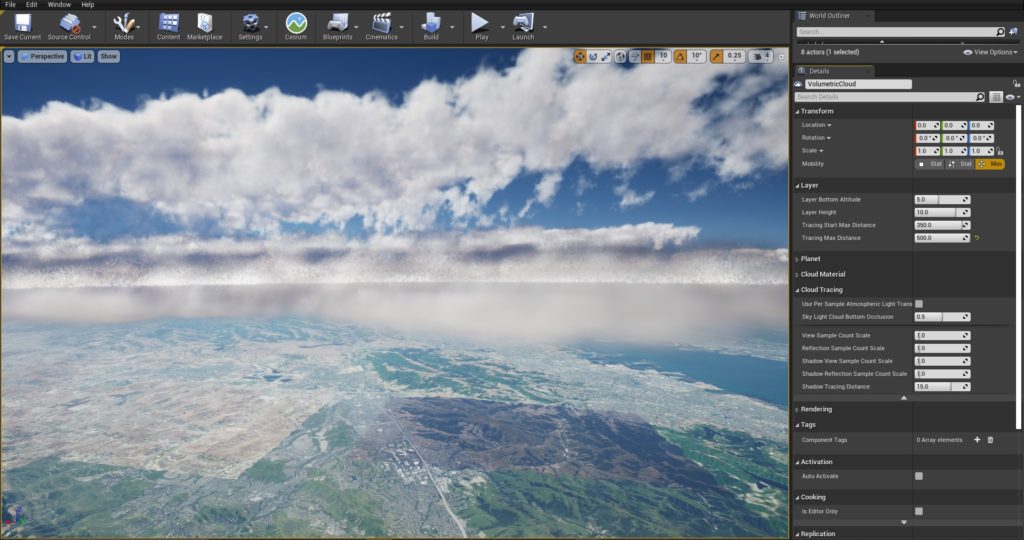
Volumetric Clouds
The default material for the volumetric clouds is very good when you standing on the ground. However, you’ll need to do some customization if you want to do things like flying through the clouds. The higher you fly above the clouds, the more obvious it becomes that the cloud pattern is repeating.
If you’re planning to create a flight simulator, then this is something you need to address. Adjusting the WeatherUVScale parameter helps, but might not be enough in situations where you’re flying through large distances. Try playing around with the other variables.
Clouds affect lighting as well. Adding them to the level makes the level a bit brighter. To achieve cinematic quality clouds, the documentation has a detailed guide here and here.
When flying through and above the clouds, you’ll need to adjust the cloud render distance by increasing the Tracing Max Distance. However, this introduces a visual artifact where you can see the horizon through the clouds. To address this, you can increase the View Sample Count Scale (significant performance cost).
You can delve into creating your own cloud material by watching this Inside Unreal video and this DiNusty Empire video.
Post-Processing
I used post-processing sparingly in these landscapes, some adjustments to Exposure, Contrast, and Vignette. The lighting actors do a very good job of making the scene look good, giving you a lot of creative control. The Sky Atmosphere settings alone can drastically change the look of your level.
One mistake I did in the past was to use Depth of Field to make landscapes appear farther. This is not the proper approach. The correct way is to borrow techniques used by landscape painters: perspective, composition, tonal values, etc. Read more about it here and here.
One thing though, I couldn’t find a way to adjust the color of the sun. Changing the Bloom Method to Convolution helps improve the sun’s appearance. Be aware that this is intended only for cinematics and screenshots.
To make the details pop some more, you can apply a post-process sharpening material as taught in this video.
Putting it all together
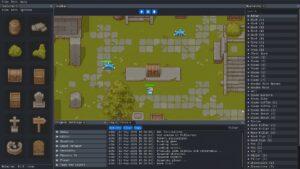
Using all of the components we discussed, here’s a GIF showing how I assembled the Grand Canyon and The Alps level:

Update: Foliage
A few months after posting this, the Cesium Documentation added tutorials for foliage placement and procedural foliage. Check them out as well.