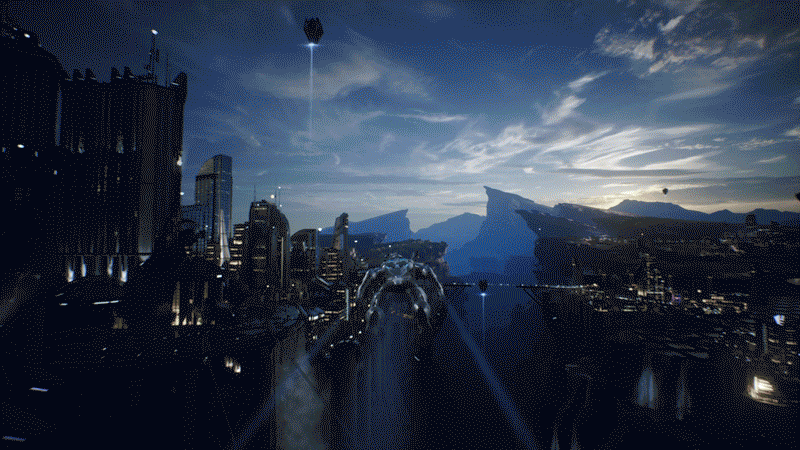
Taking inspiration from Ratchet & Clank: Rift Apart, I experimented with a portal transition effect between maps using level streaming. I used Epic’s Infiltrator Demo and Zen Garden for the 3D environment assets. Additionally, I used Wraith from Paragon for the character model and Dynamic Flight for the character flight controls.
In summary, here’s a diagram of the portal transition effect:
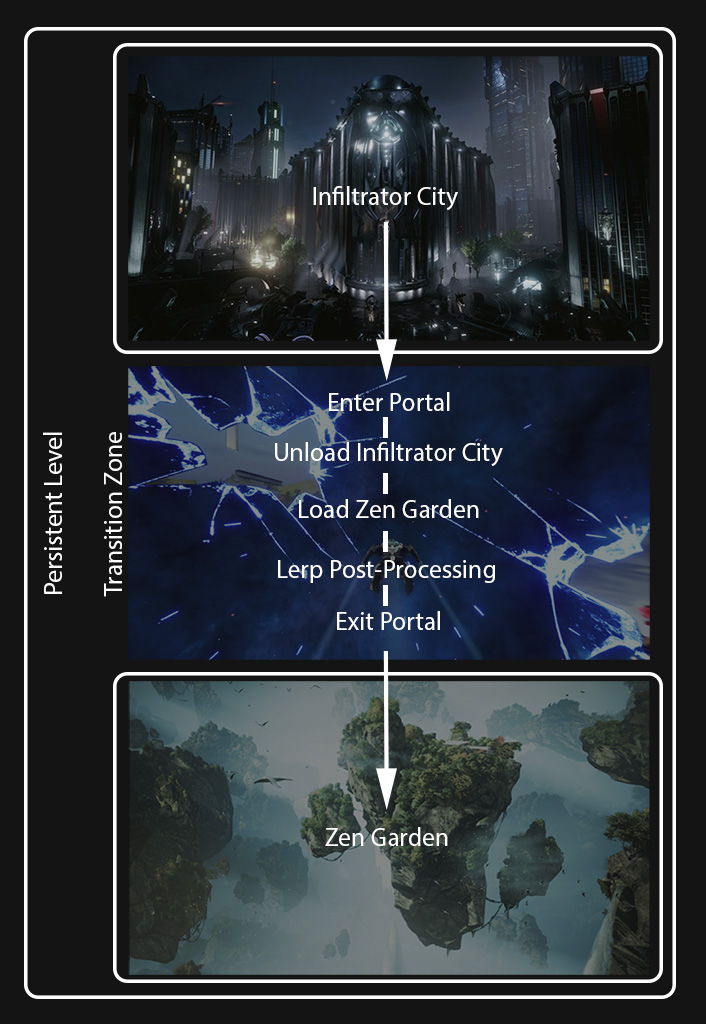
Let’s take a closer look at what’s happening under the hood.
Level Streaming
Update: Unreal Engine 5 added the Data Layers feature that is an alternative to Level Streaming. Check it out.
Level streaming allows asynchronous loading and unloading of levels during play to decrease memory usage and create seamless worlds. You can find references in the Level Streaming documentation, particularly this guide which uses blueprints instead of level streaming volumes. Furthermore, Alan Willard talked about the different techniques that you can use to handle loading levels seamlessly in this video.
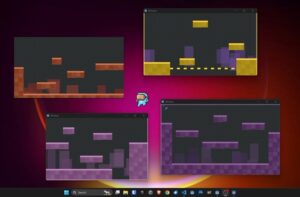
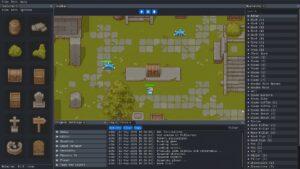
The process of loading/unloading huge levels can cause obvious stuttering. To minimize impact on performance, you should consider creating multiple sublevels for your 3D models:
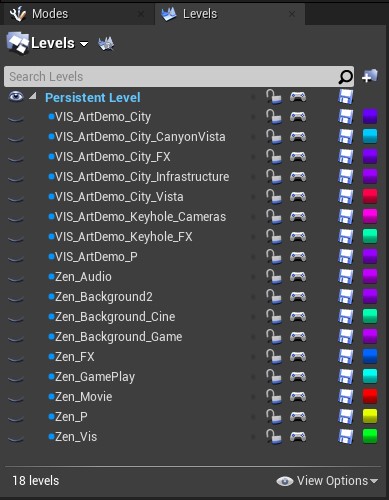
After setting up the sublevels, I then made a blueprint that does the loading/unloading between Infiltrator City and Zen Garden.

Zoomed in for better view:
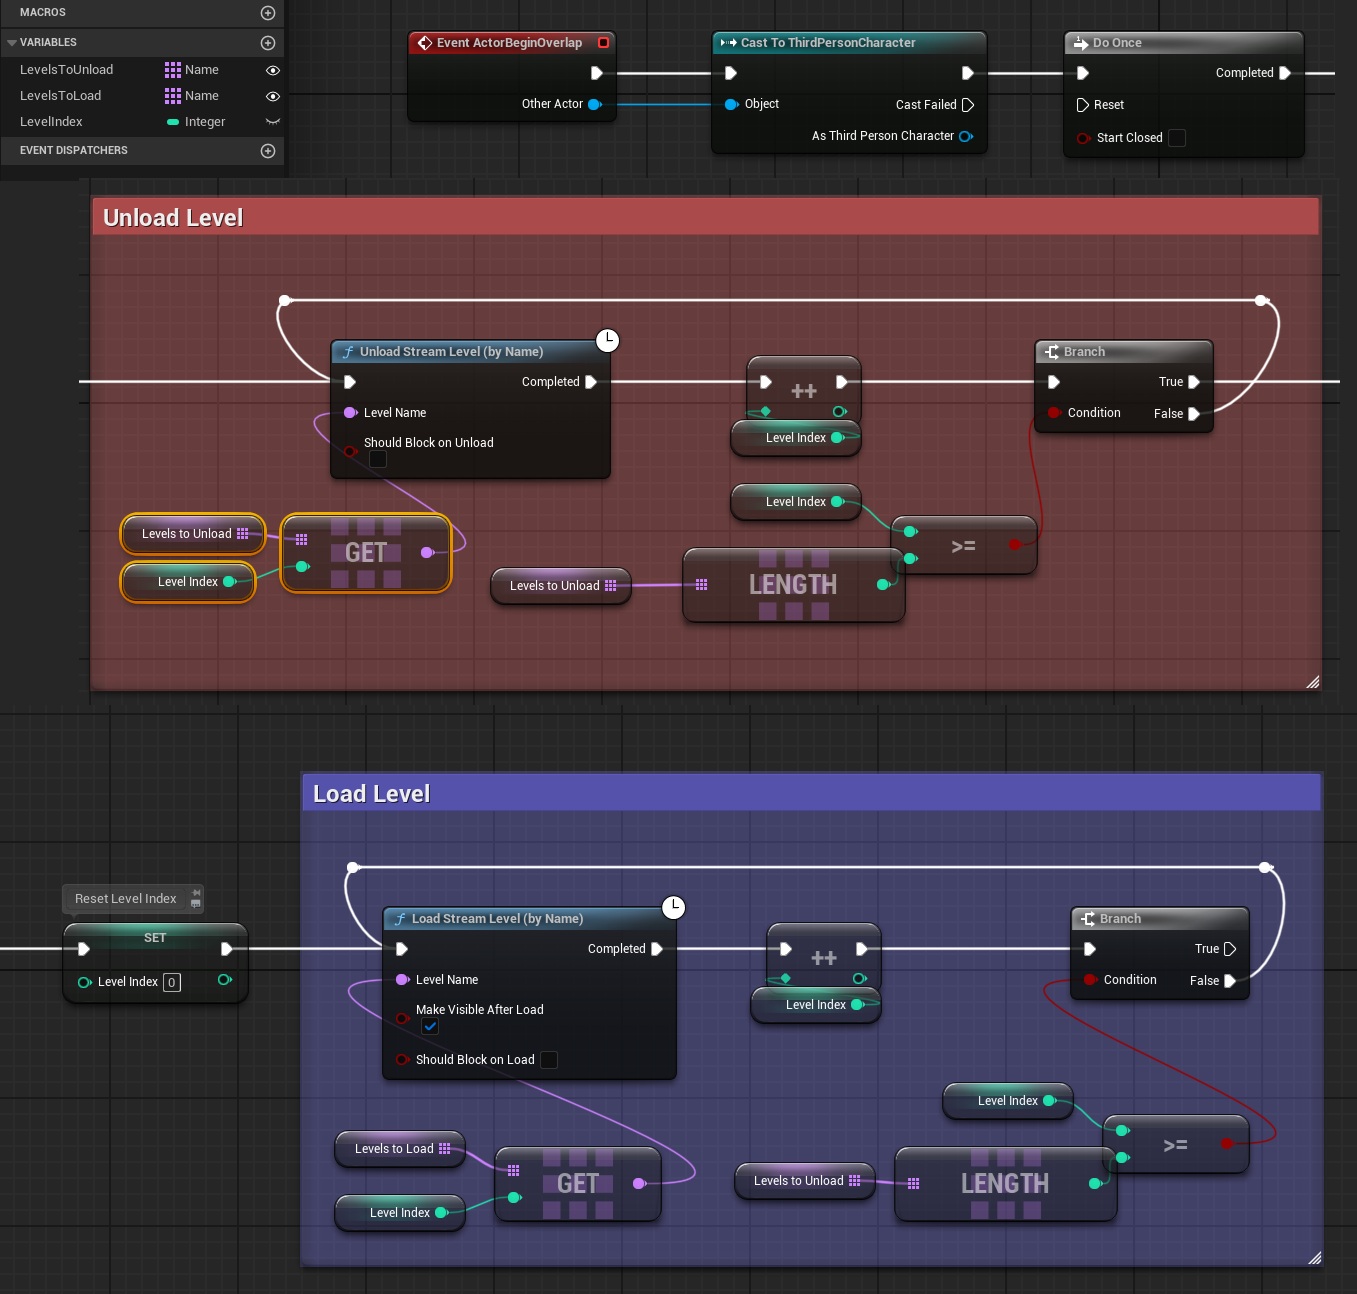
Take note that the order of these nodes is important. If you use a Sequence node or function nodes, this can potentially cause some of the sublevels to be loaded/unloaded out of order. This introduces some visual glitches caused by multiple light sources, reflection captures, and post-processing volumes being present at once.
If you encounter performance issues such as slow level streaming, follow Ben Zeigler’s guide on optimizing and debugging memory. Moreover, there are cases when you find assets which are not supposed to be loaded into memory. You can use tools such as the Reference Viewer and Size Map Window to dig down deeper. Lastly, it is best to debug on a packaged build due to the inaccurate numbers you get from testing in the editor.
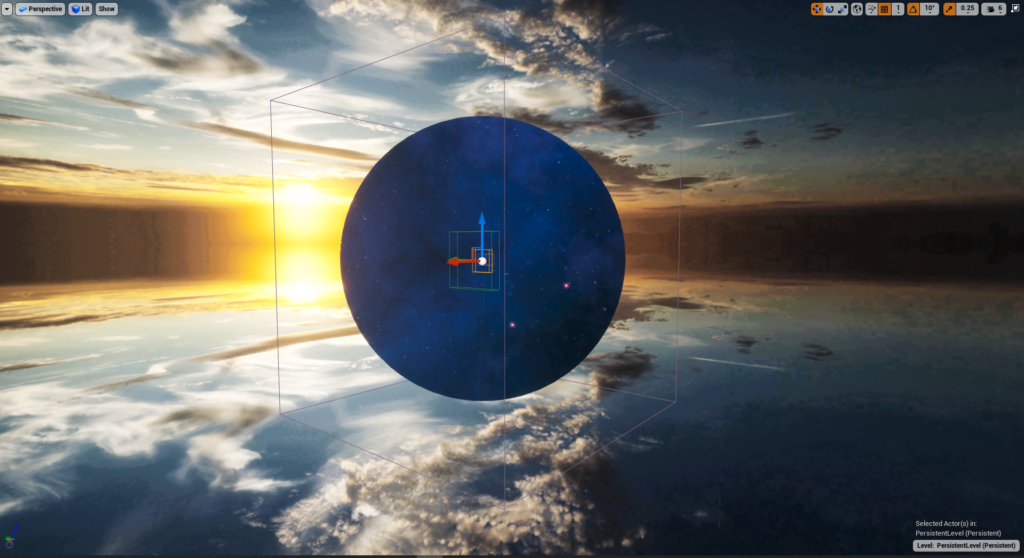
Level Transition Zone
In the persistent level, I set up a transition zone which is hidden somewhere in the map. This is basically a big inverted sphere with a Cubemap material. Upon entering the portal, the player is teleported into the center of this sphere where he cannot see the environment assets. This allows me to unload the current level and load the next level without the player noticing.
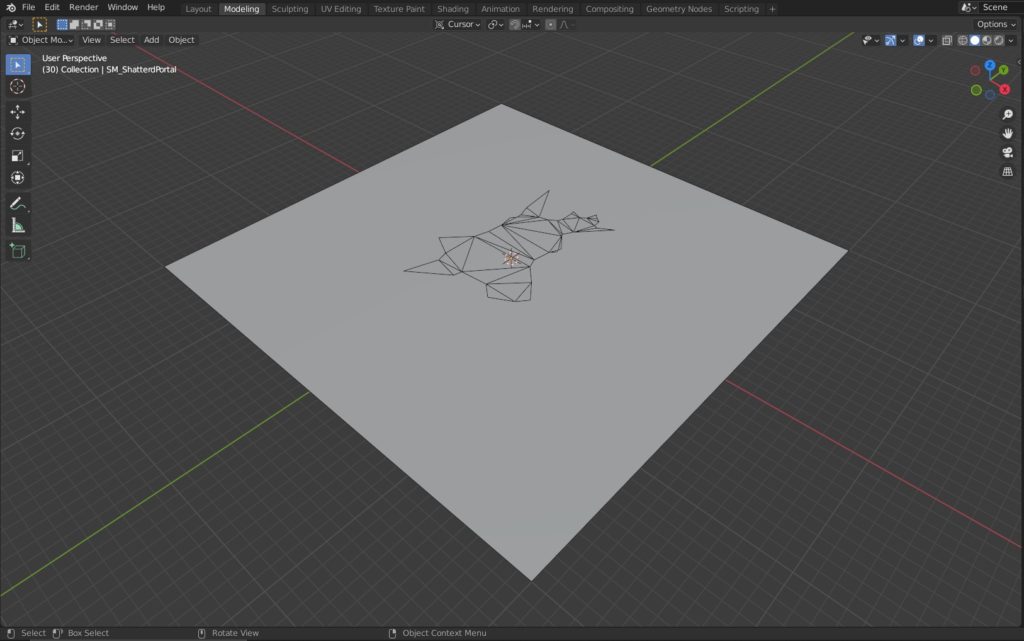
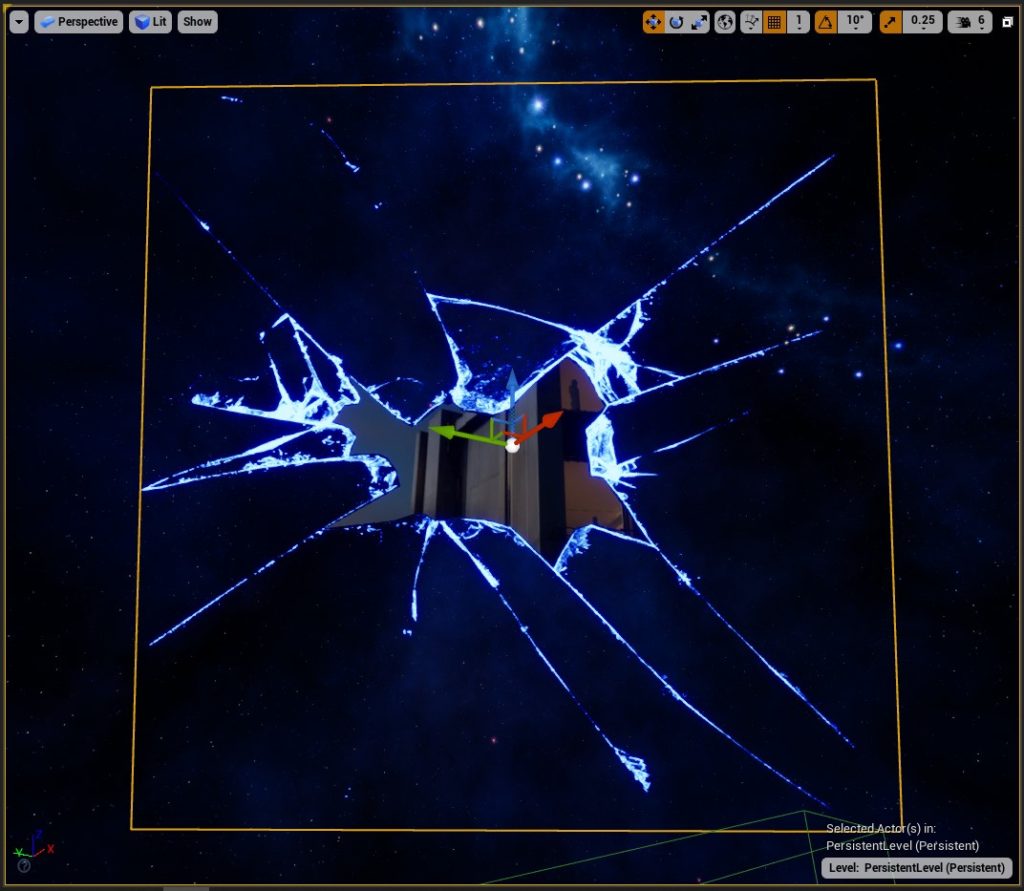
Shattered Dimension Hole
This effect is a mesh with 2 layers: the center that has a cubemap material, and the surrounding quad that has an emissive shattered glass texture.
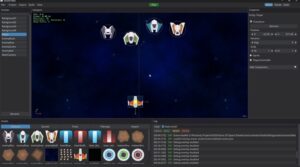
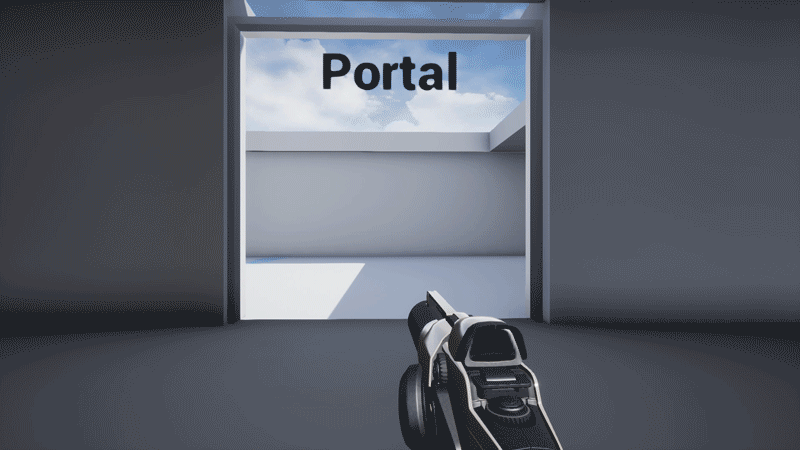
The Portal
I used a slightly modified version of the particle system from Gideon‘s meteor skill.
There are many portal tutorials online that show how to teleport a first-person character from one location to another. In first-person, the camera is on the character’s head. When the actor’s collider triggers the portal, you don’t notice the teleport occurring.
However, there are a a few more things to consider when using a third-person camera. In third-person, the camera is at a certain distance from the character mesh. When the mesh collider triggers the portal, the parent actor teleports along with its children (which includes the camera). You can clearly see the effect below where the parent actor teleports and the environment behind the player changes for a split second:
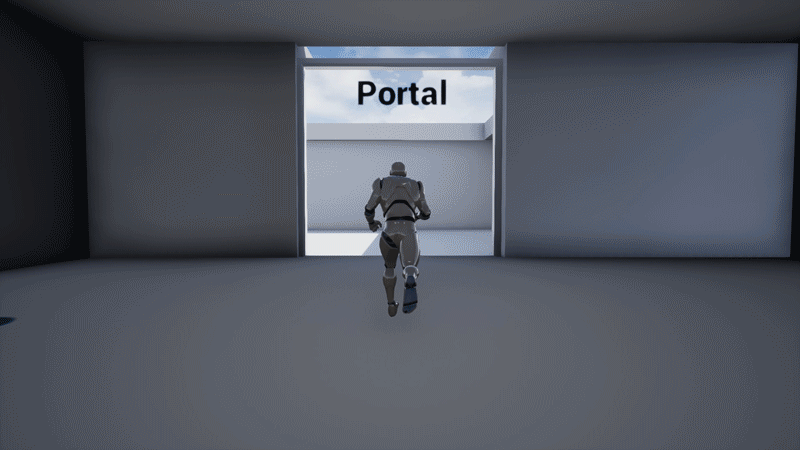
The solution is to use a camera system that respects the teleportation when entering the portal. Luckily, Portals Blueprint (Note: UE5 not supported) was one of the Marketplace monthly giveaways last December 2019. It has an example third-person camera setup which I modified to achieve the desired effect.
Post-processing Lerp
There is an obvious visual hiccup when loading between levels with different lighting and post-processing values. This is more evident when transitioning between a night-time and a day-time map. One method to minimize this glitch is to store the post-processing settings of each group of sublevels and then lerp between these values once the player is inside the portal. To change post-processing settings, we use the blueprint node Set members in PostProcessSettings.
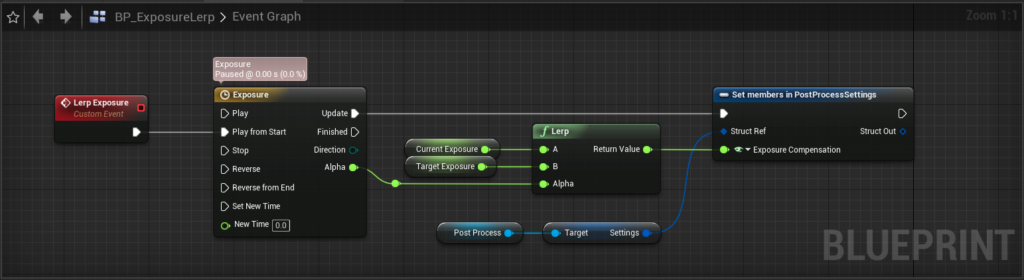
In my case, lerping only Exposure Compensation was quite enough. You can try lerping the other settings as well.
Putting it all together
Here is the final transition when everything is working together:
80 Level Article
Lastly, thank you to 80 Level for featuring this in their website! Here is the article: Link.