This post contains some of the things I learned and workflows I used while creating a VR multiplayer prototype using Unity 2021.3.9f1. All 3D models are from the asset store. There are still a lot of things I’d like to add such as voice chat and object interactions. Those will come in the future when I have more time.
VR and non-VR mode
You can add the option to switch between VR and non-VR mode on a single build. There is a solution found in this thread where you attach the script below on an empty game object and launch the game with the –enable-vr flag after the game.exe.
using System.Collections;
using System.Collections.Generic;
using UnityEngine;
using UnityEngine.XR.Management;

public class VRSwitcher : MonoBehaviour
{
    public void Awake()
    {
        StartCoroutine(StartXRCoroutine());
    }

    // This function checks out startup arguments to see if we want VR
    // To do this, create a desktop shortcut and add the arg at the end.
    // Example: "C:\Path\To\Game.exe" --enable-vr
    private static bool GetArg(string name)
    {
        var args = System.Environment.GetCommandLineArgs();
        for (int i = 0; i < args.Length; i++)
        {
            Debug.Log($"Arg {i}: {args[i]}");
            if (args[i] == name)
            {
                return true;
            }
        }
        return false;
    }
    // From unity docs
    // https://docs.unity3d.com/Packages/com.unity.xr.management@4.0/manual/EndUser.html
    public IEnumerator StartXRCoroutine()
    {
        var enableVRArg = "--enable-vr";

        // Only run the code block when we want VR
        Debug.Log("Looking if VR should enable");
        if (GetArg(enableVRArg))
        {
            Debug.Log("Initializing XR...");
            yield return XRGeneralSettings.Instance.Manager.InitializeLoader();

            if (XRGeneralSettings.Instance.Manager.activeLoader == null)
            {
                Debug.LogError("Initializing XR Failed. Check Editor or Player log for details.");
            }
            else
            {
                Debug.Log("Starting XR...");
                XRGeneralSettings.Instance.Manager.StartSubsystems();
            }
        }
        else
        {
            Debug.Log("Did not find VR arg, starting in 2D");
        }
    }
}
Also, take a look at XRSettings.enabled in case you need it.
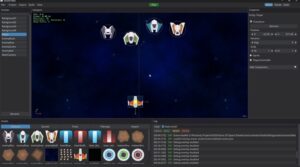
Photon Multiplayer
Photon Unity Networking 2 (PUN 2) is the go-to multiplayer solution for simple Unity apps. Something to consider is that this asset is now in long-term support mode. This means that new features will no longer be added.
I won’t go into detail on this because there are already a lot resources for Photon. You can follow the series below by Valem on how to implement Photon for your VR multiplayer app. He covers the fundamentals of syncing animation and creating/joining a room.
You will, without a doubt, encounter issues when testing multiplayer. I’ve experienced problems such as not seeing players who already joined and multiple users using the same camera. Don’t forget to check the PUN forums when looking for a solution to a problem. Somebody might have already answered your question.
Full Body IK (Inverse Kinematics)
Final IK is a popular inverse kinematics library for Unity. It has a full-body IK solver dedicated for virtual reality which supports up to 6 tracked points. Documentation here. Take a look at a sample here. Follow this guide by Tevfik Ufuk Demirbaş on how to set it up using only an HMD and two controllers (Oculus Quest 2).
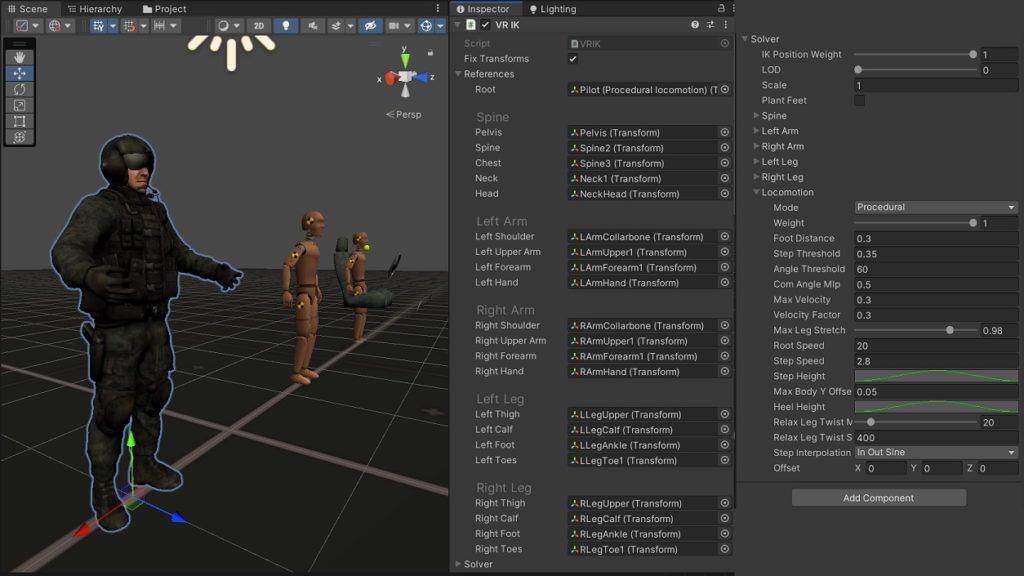
There are a lot of settings here to tweak. Try making adjustments if you find your avatar having weird positions and rotations.
I found VR legs to be the most troublesome. Without any leg trackers, it is impossible for the solver to accurately predict what type of leg motion you’re doing. This means you’ll encounter weird leg movement whenever you try to lean your body, spread your legs, take a small step, or walk forward. You can try adjusting the settings under Solver > Locomotion to achieve desirable results.
Check out this blog post by the developers of Dead and Buried for further reading.
Moreover, it is easier to forgive IK miscalculations when using stylized avatars. In my testing for instance, I find Adventurer Blake (left) to be creepy in VR because of the dead eyes, emotionless face, and stiff body movement. On the other hand, I find Robot Kyle (right) more acceptable even if I encounter inaccuracies in his arm and leg transforms. Unity-chan is somewhere in the middle. You might already know this phenomenon as the uncanny valley. More realistic avatars raise user expectations which also makes it easier for them to break the immersion for every little discrepancy they see.
Because of the challenges above, a lot of VR apps today opt to use stylized avatars with head, body, and hands, but no arms and legs. These avatars also have simplified eyes and mouths, or sometimes no eyes and mouths at all. These help reduce the effects of the uncanny valley and maintain presence.
VRIK Calibration
There are two sample VR calibration scenes in Final IK: one for head and hand anchors only, and one for multiple anchors. If you don’t have any other tracked device other than the HMD and controllers, then go with the calibration scene found in the location below:
Plugins > RootMotion > FinalIK > _DEMOS > VRIK > VRIK (Basic Head & Hands Calibration).unity
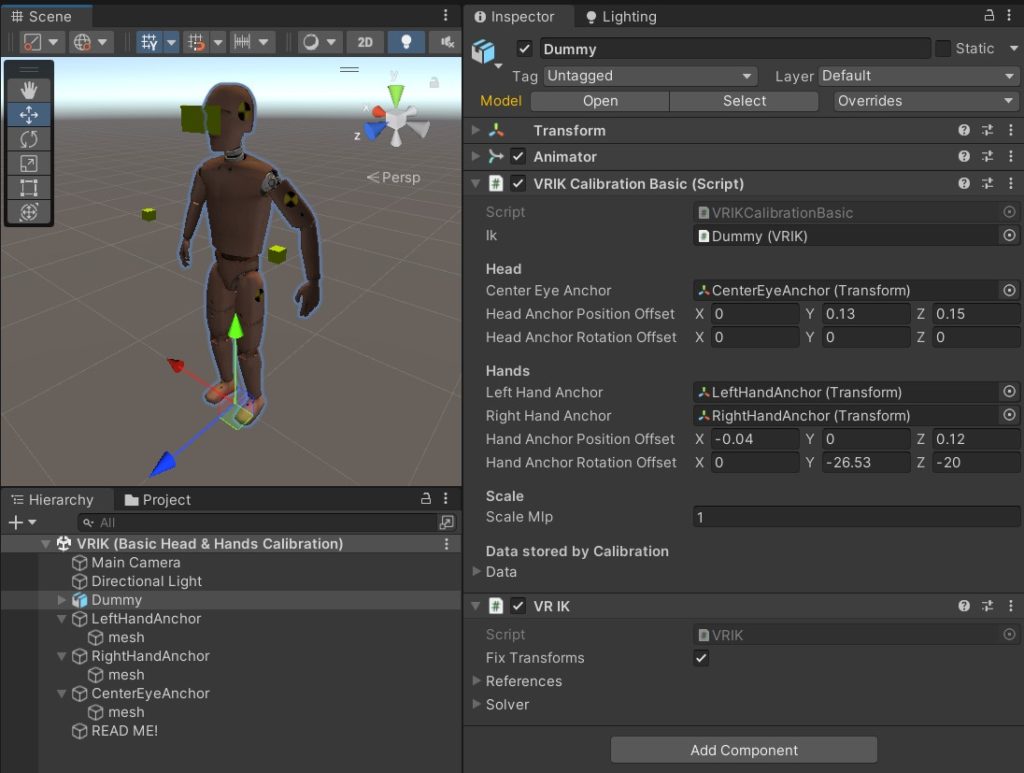
Open the script VRIKCalibrationBasic.cs and study its contents. To calibrate, you need to store the data using the line below:
data = VRIKCalibrator.Calibrate(ik, centerEyeAnchor, leftHandAnchor, rightHandAnchor, headAnchorPositionOffset, headAnchorRotationOffset, handAnchorPositionOffset, handAnchorRotationOffset, scaleMlp);One important note is to make sure to call VRIKCalibrator.Calibrate() in LateUpdate. If you try calling this method in Update() or input events, you’ll experience weird calibration issues. I believe this has something to do with Script Execution Order.
Avatar Selection
Each avatar you use has a different body proportion and bone rotations. You’ll want to trigger the VRIKCalibrator.Calibrate() method right after you change avatars and store the calibration data for future use.
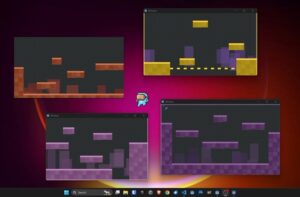
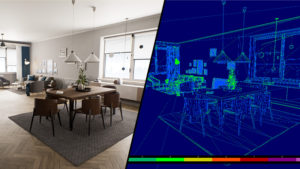
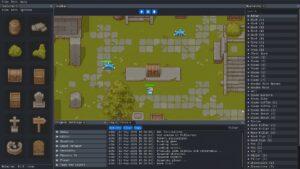
Map Selection
I used 3D models from ArchVizPRo for the environment. For the fade transition between levels, I used a quad mesh in front of the camera (tutorial). Alternatively, there is a Screen Fade asset from the store which uses post-processing. Additionally, here is a method for screen fading using Universal Render Pipeline.

Loading scenes additively can cause lighting issues because Unity does not know which lighting setting to use when multiple scenes are loaded. Based on this thread, you can use the code below to assign which scene should be the active one.
SceneManager.LoadScene( "myScene", LoadSceneMode.Additive );
yield return 0; // wait a frame, so it can finish loading
SceneManager.SetActiveScene( SceneManager.GetSceneByName( "myScene" ) );
Troubleshooting
There are bugs that I’ve encountered which fortunately have workarounds:
Black Screen when using Virtual Desktop in Oculus PC App
Solution here. This seems to happen mostly on VR-ready laptops when the Oculus processes use the integrated Intel graphics instead of the dedicated GPU.
Type of instance in array does not match expected type
Known bug in the Input System which might have something to do with Script Execution Order. It doesn’t seem to affect your app, but it does send an error message in the logs.
Type of instance in array does not match expected type
UnityEngine.InputSystem.PlayerInput:OnDisable () (at Library/PackageCache/com.unity.inputsystem@1.4.1/InputSystem/Plugins/PlayerInput/PlayerInput.cs:1735)
This bug has been documented in this and this thread. The workaround is to put this script above the PlayerInput component causing the issue:
using UnityEngine;
using UnityEngine.InputSystem;

public class PlayerInputErrorWorkaround : MonoBehaviour
{
    private PlayerInput Input;

    private void Start()
    {
        Input = GetComponent<PlayerInput>();
    }

    private void OnDisable()
    {
        Input.actions = null;
    }
}