This article is a continuation of a previous post Unreal Engine Multiplayer with Photon Cloud. Be sure to check that one first if you haven’t already. A often reference that blog post in this article.
Let’s proceed with VR multiplayer using Photon. The guide below is derived from this sample project from GitHub. We’ll start with something very simple: two desktop VR users on separate machines. No avatars yet, only HMD and controller 3d models.
Compared to the previous FPS multiplayer, VR has more complexity and limitations:
- Each player owns multiple actors that we need to sync: VR origin, head-mounted display, left and right hand controllers.
- We can’t test two VR users on a single machine. The only way to do testing on a single machine is to have one VR user and one FPS user, which can sometimes cause crashes based on my testing. This approach can be useful when testing replication only.
- The VR Template from UE 4.27 onwards are not multiplayer friendly unfortunately. Because of this, we need to reimplement the VR pawn and motion controller blueprints.
Set up basic VR multiplayer
1. Enable the Photon Cloud plugin
Do the same procedure as the FPS example in my previous post.
2. Create BP_GameMode, BP_VRPawn, BP_MotionController, BP_HeadMountedDisplay
Creating the necessary blueprints.
- BP_GameMode – contains the logic to correct the photon and spawning VR pawns.
- BP_VRPawn – inherits from Pawn. Has a VROrigin and Camera component. Will spawn BP_MotionController and BP_HeadMountedDisplay during runtime.
- BP_MotionController – two actors to represent the left and right hands. Add an event Setup Hands in this blueprint which we will call later.
- BP_HeadMountedDisplay – an actor for head tracking. Add an event Setup HMD in this blueprint which we will call later.
3. Set up BP_GameMode
Create BP_GameMode the same way as the one from the FPS example. The difference is in the OnPlayerJoinedRoom event. We spawn a VR pawn, trigger a Setup Player event, and possess it if it is a local player.

4. Set up BP_VRPawn
Add a Scene Component named VROrigin which has a child Camera component. Make sure that the camera has Lock to HMD enabled.
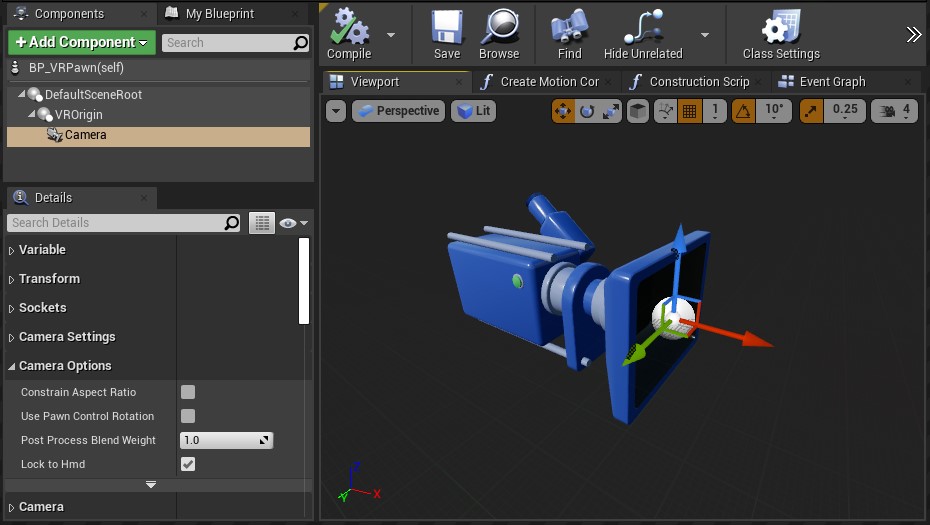
The finished blueprint looks like this:
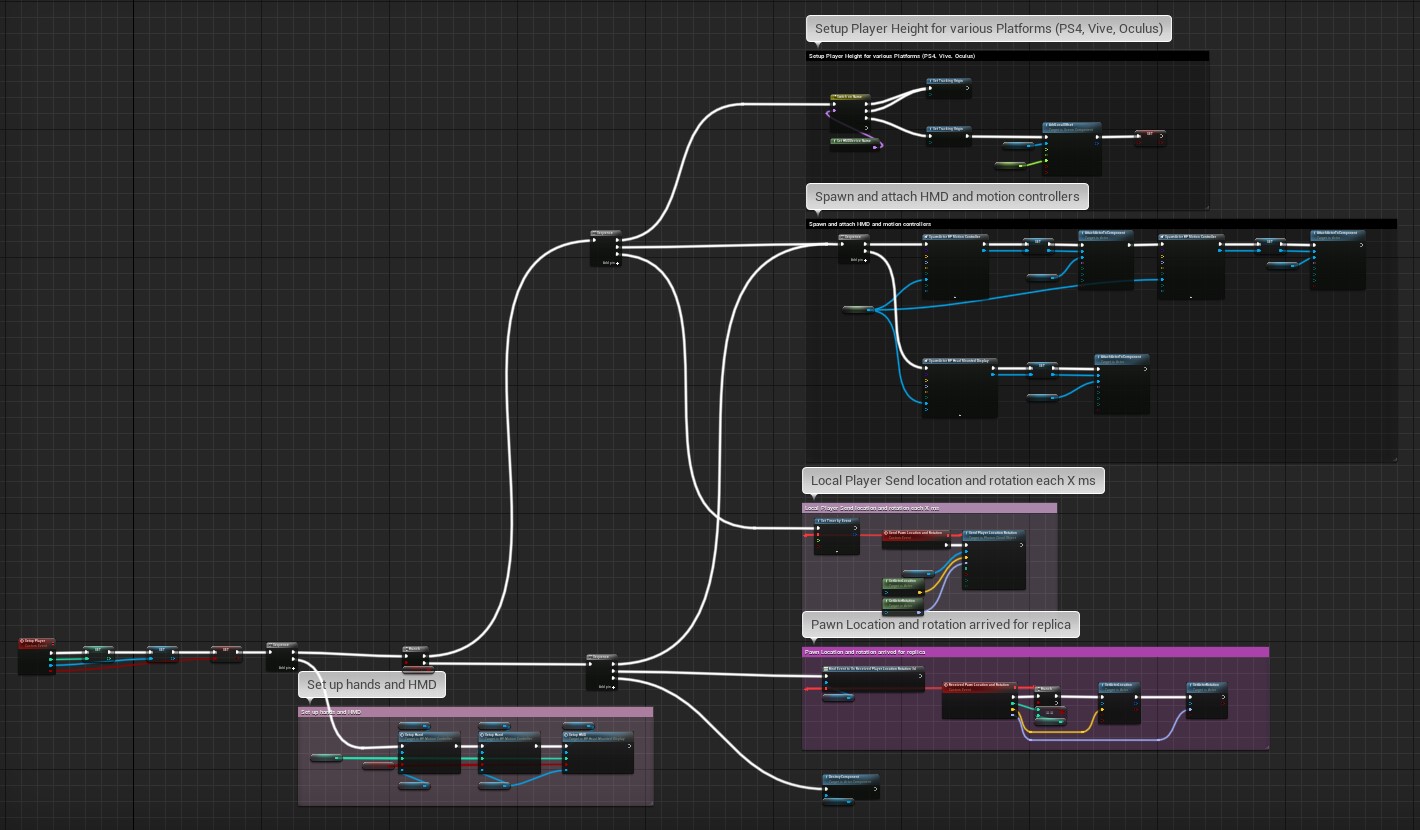
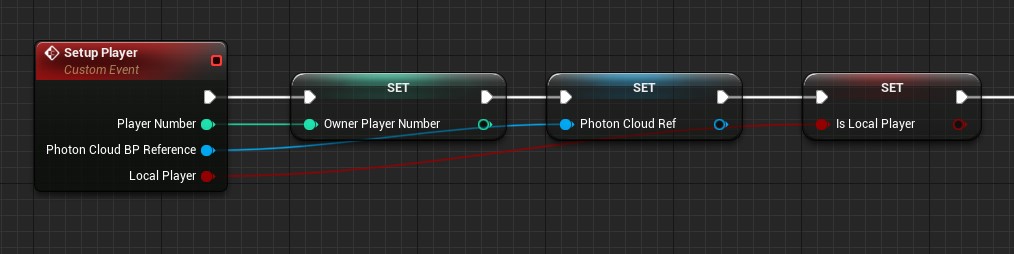
First, we define Setup Player and store the references.
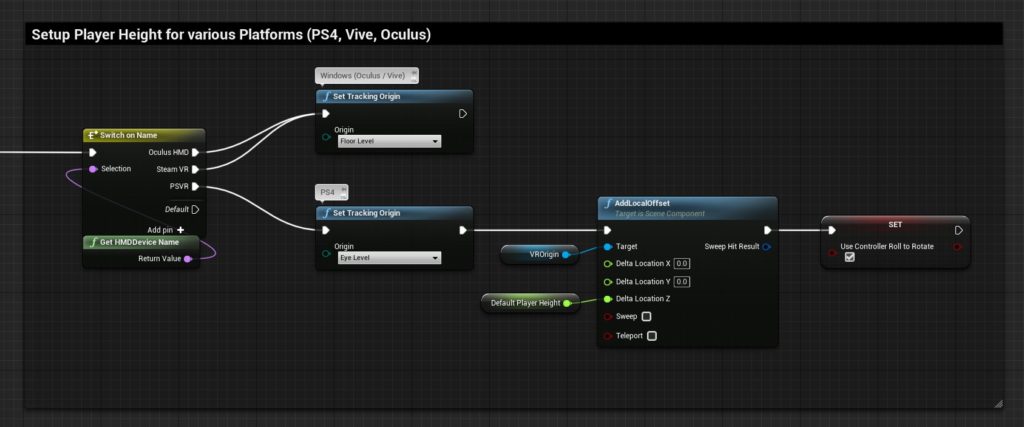
The next few steps depend on whether or not the user is a local player. If yes, we set up player height.
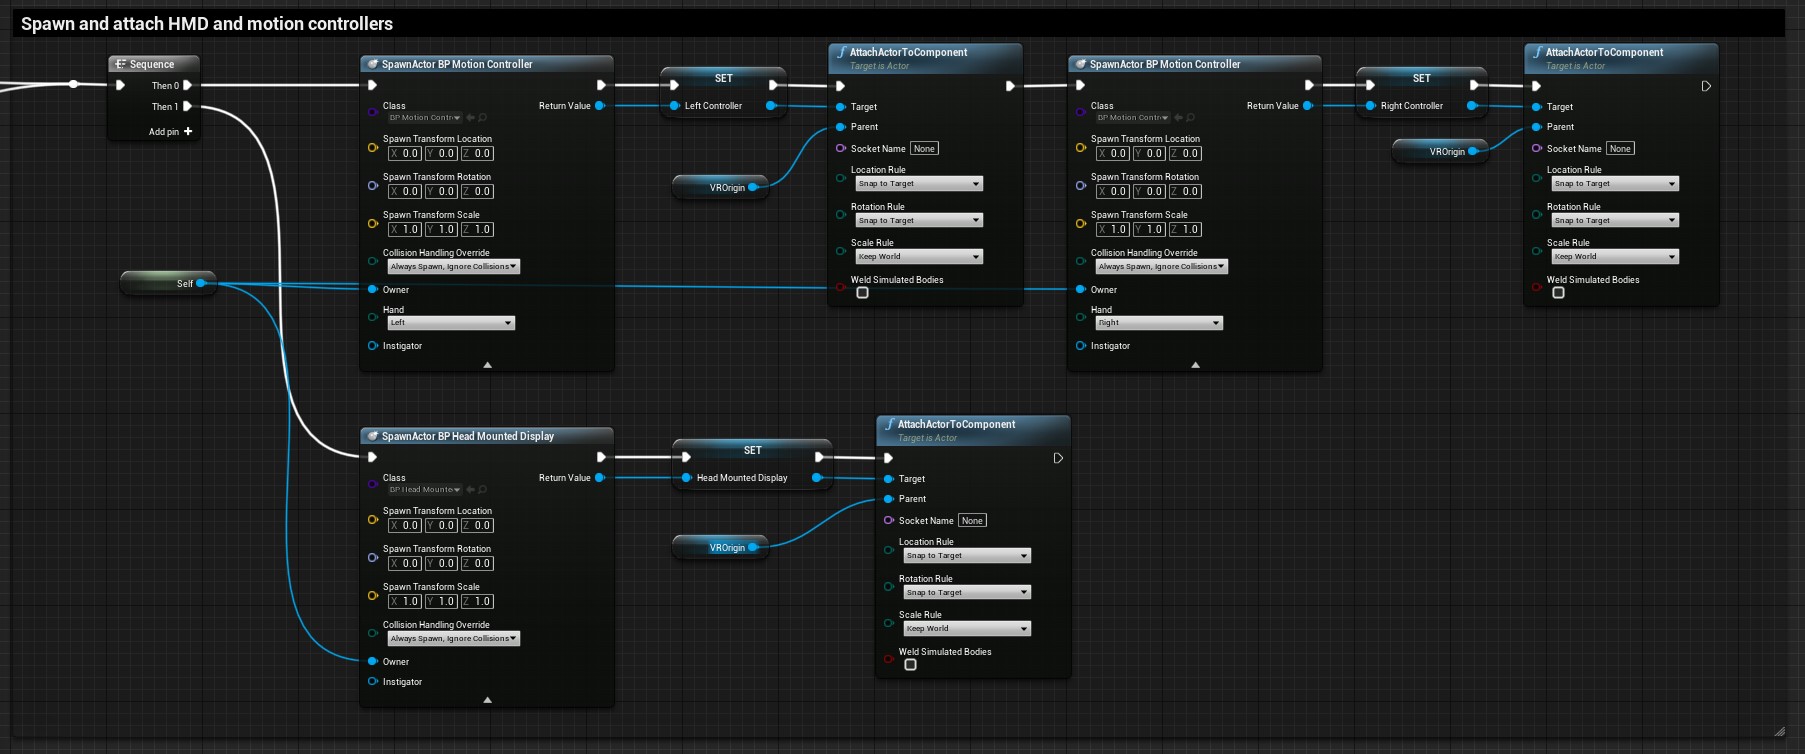
Spawn HMD and controllers. Attach them to VROrigin. To determine which motion controller belongs to which hand, you need to create a EController Hand type variable in BP_MotionController. Name this “Hand” and enable the Instance Editable and Expose on Spawn. You can now set which controller belongs to left or right after spawning them.
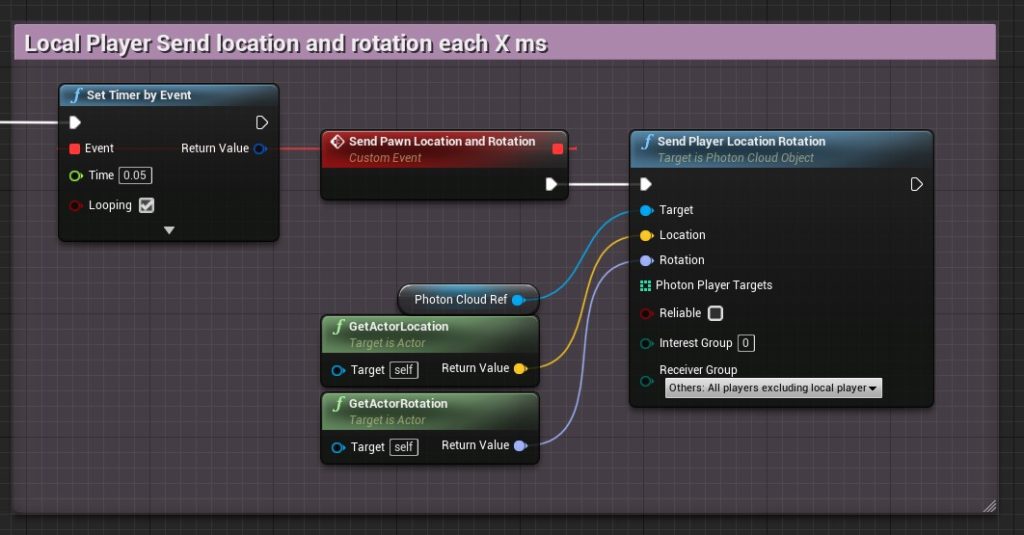
Lastly, we send the player’s location and rotation to Photon Cloud.
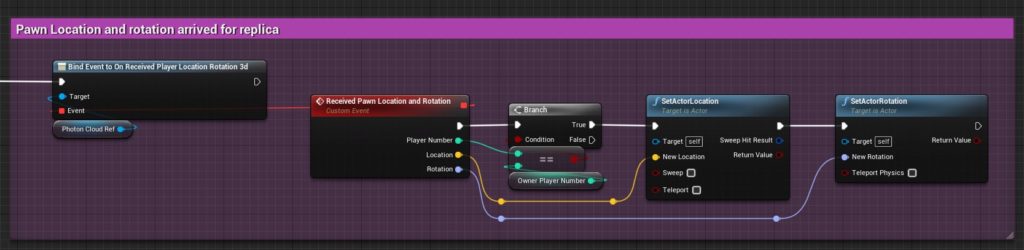
On the other hand, if the player is not a local player, we change a few things. First, spawn the HMD and controllers like the one above. Next, we bind an event to OnReceivedPlayerLocationRotation3d and set BP_VRPawn’s location and rotation.
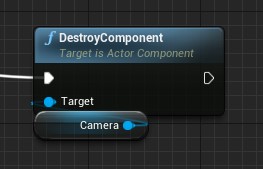
And destroy the camera because a remote VR Pawn does not need it.
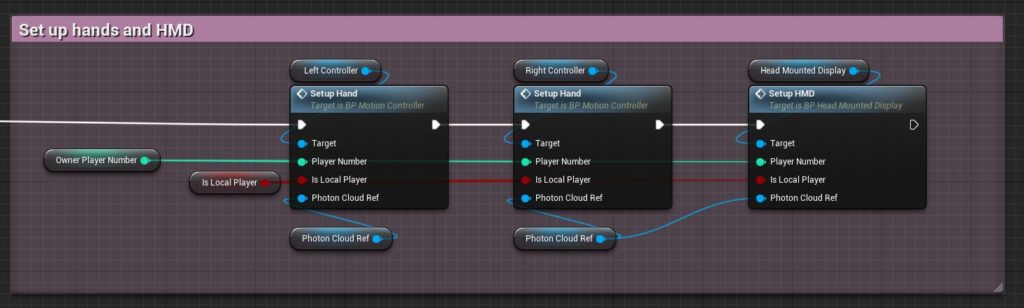
In both local and remote players, we call Setup Hand and Setup HMD, both functions take PlayerNumber, IsLocalPlayer, and PhotonCloudRef as inputs.
5. Set up BP_HeadMountedDisplay
This blueprint is a 3D model of an HMD that tracks the player’s head movement. Add a static mesh component and create the variables as shown below:
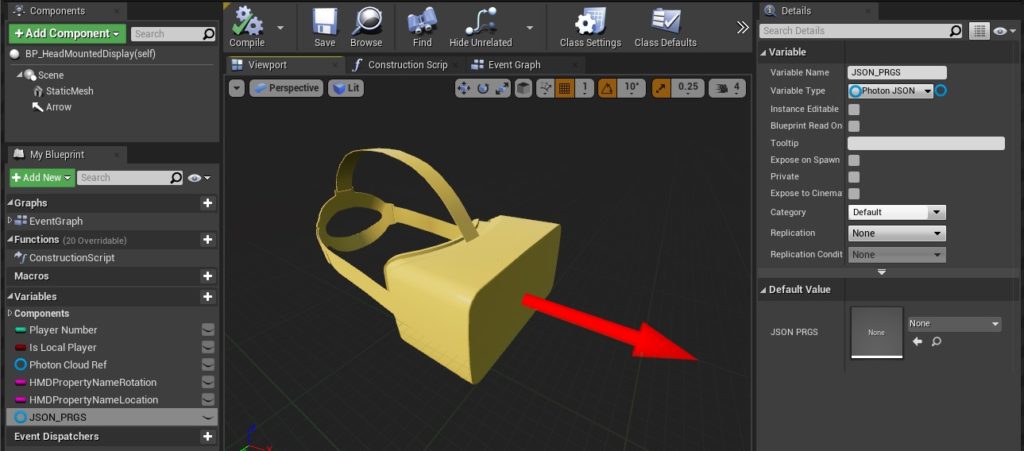
The finished blueprint looks like this:
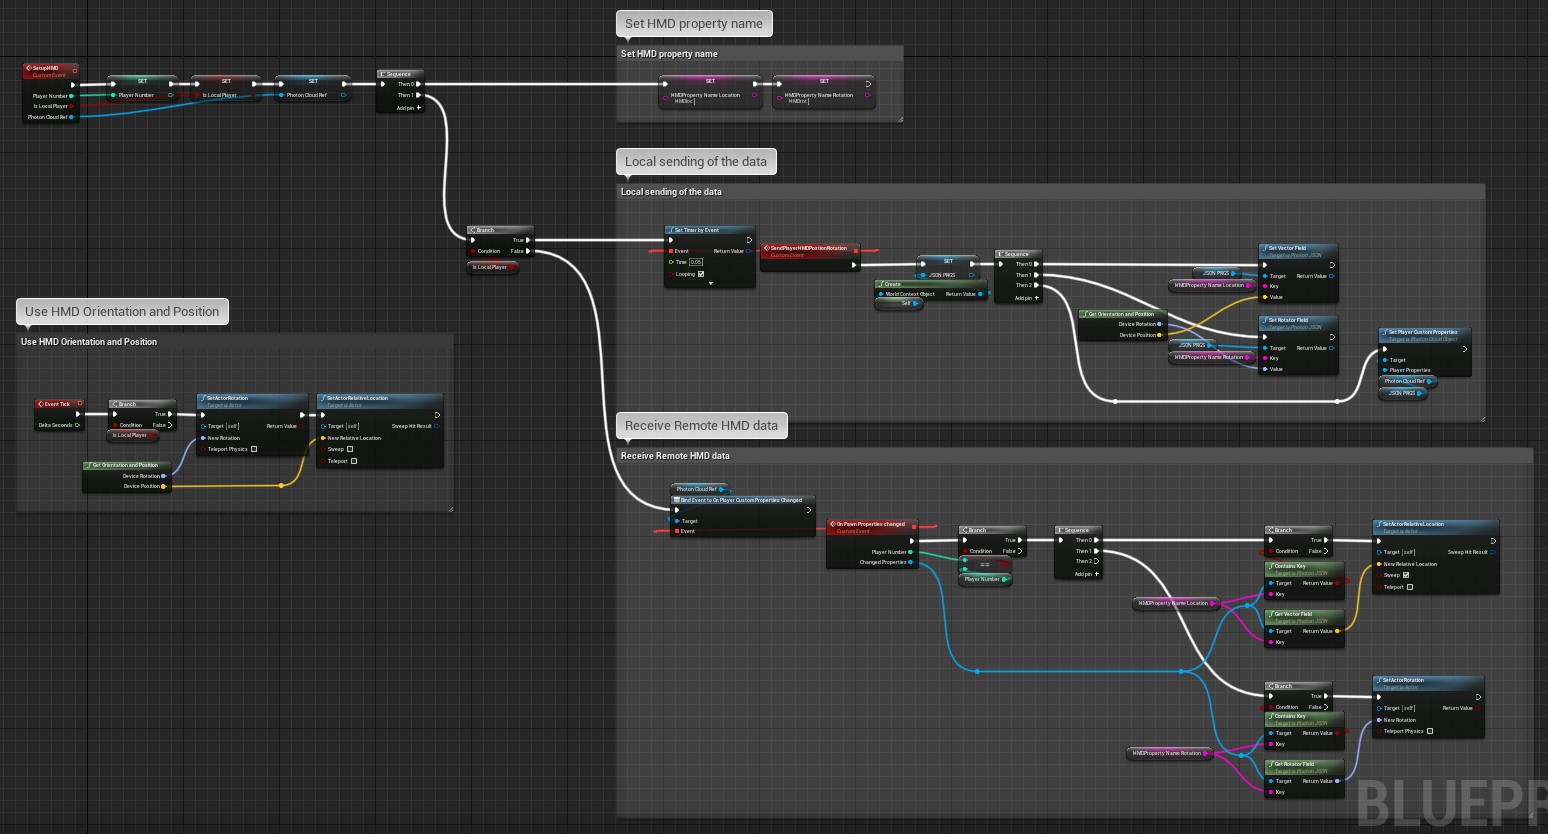
Similar to the previous blueprint, we define SetupHMD and store the references. Moreover, we set the strings of HmdPropertyNameRotation and HmdPropertyNameLocation. We will use these later to store the HMD’s orientation and position.
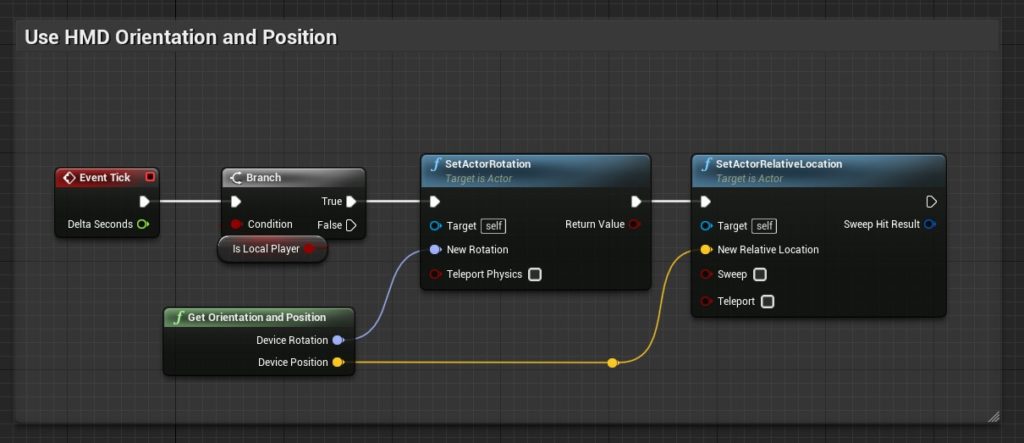
On Event Tick, we set the actor’s world rotation and relative location using the Get Orientation and Postion. This node grabs the tracked HMD’s transforms. If no HMD is detected, it will return a zero vector.
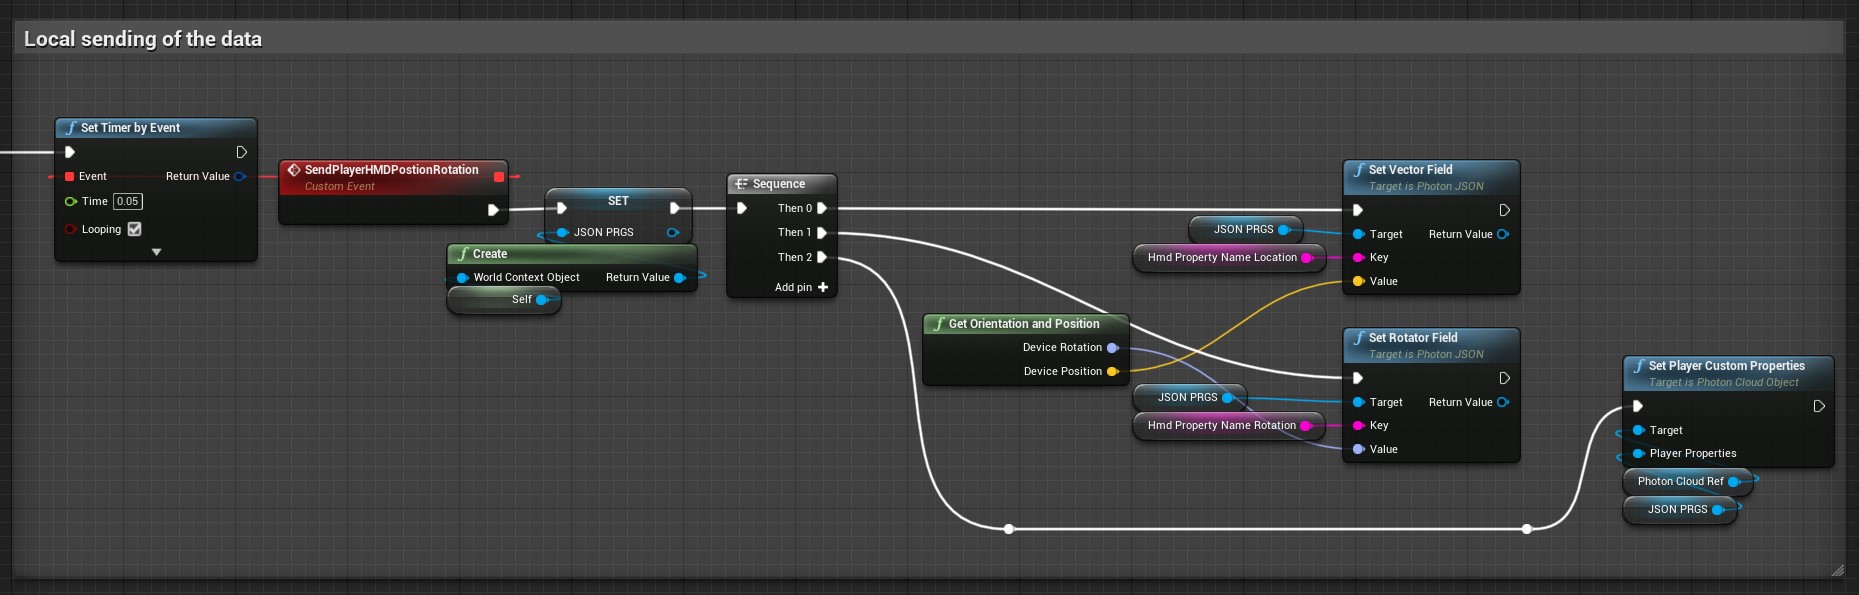
If the user is a local player, we send the HMD’s position and orientation using the Set Player Custom Properties node.
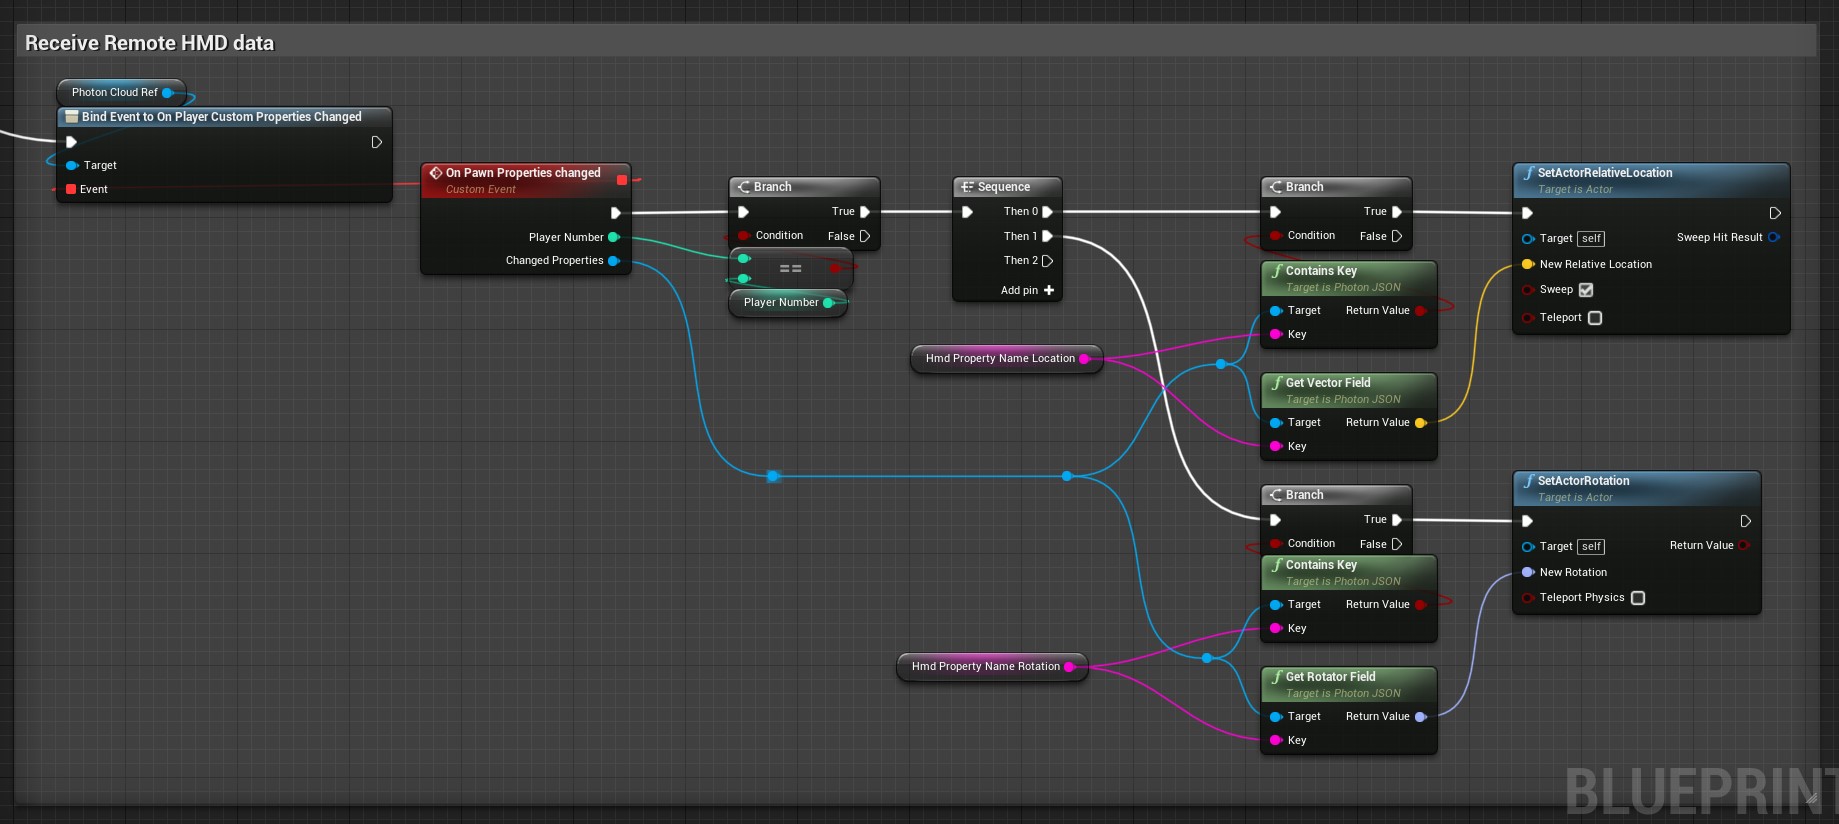
If the user is a remote player, we receive the custom properties and set the HMD’s location and rotation.
6. BP_MotionController
This blueprint looks very similar to BP_HeadMountedDisplay. It’s also relying on a tracked device.
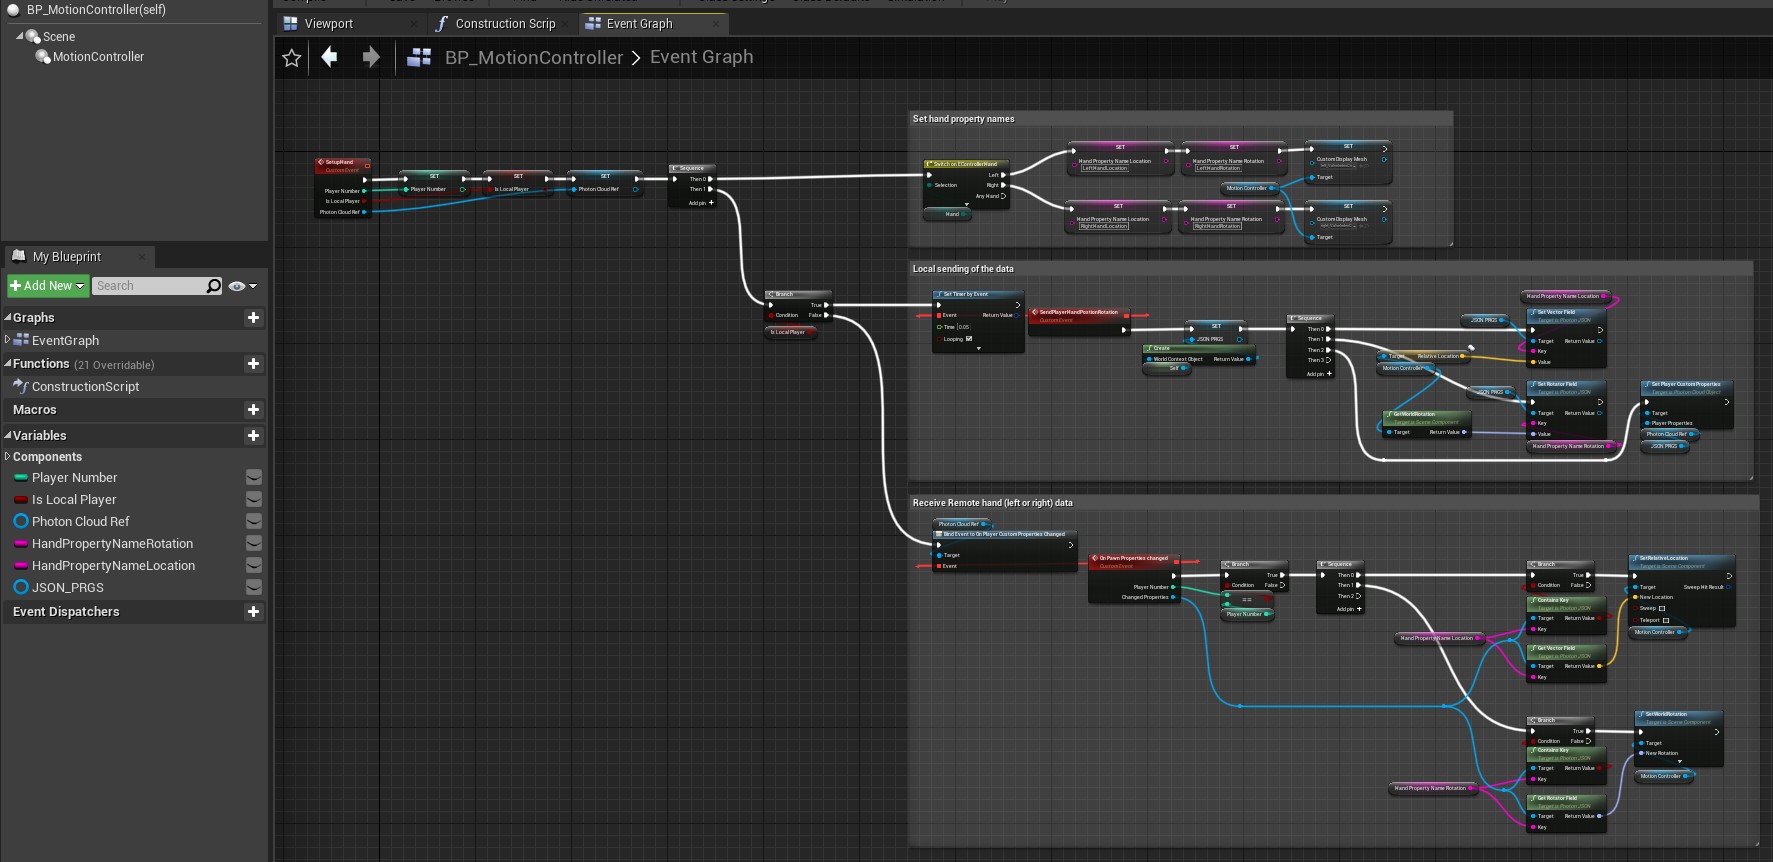
The main difference is that we add a switch statement to handle the property names and display mesh of the left and right hands.
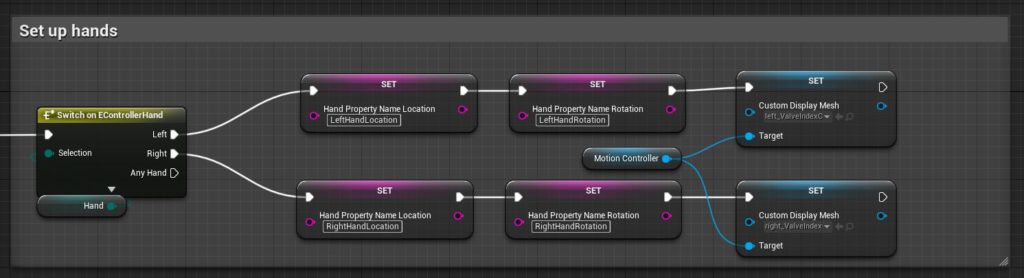
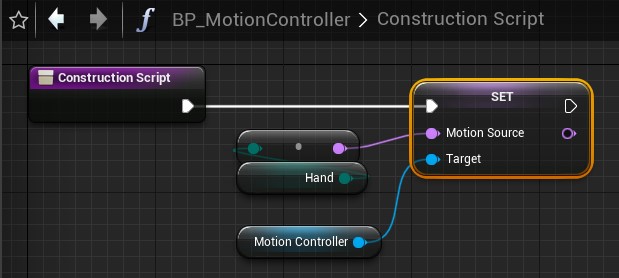
The Hand variable of type EController Hand should be Instance Editable and Expose on Spawn. This way, we can set the left and right hands when BP_VRPawn spawns them. Furthermore, we add the following in the construction script to change the Motion Source automatically when the Hand variable changes.
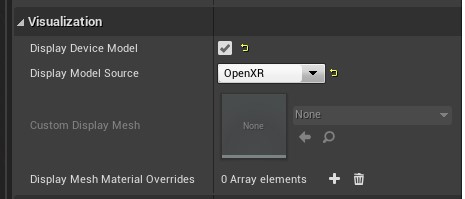
It is recommended to use a custom 3D model for your motion controller because the default Display Model Source of the Motion Controller component can sometimes fail to show a 3D model.
Select between VR and non-VR pawns
We know how to add multiplayer to both FPS and VR experiences. Now, we combine these two to give the user an option to choose between a VR and an FPS pawn.
1. BP_GameInstance
We need a blueprint that will store a boolean indicating VR or non-VR mode. This blueprint should persist between levels and always be accessible. The game instance is a suitable location for this.
Create a game instance blueprint and assign it in the project settings. Set the boolean to false to make sure you enter the main menu in non-VR mode. If you don’t, the viewport might glitch.
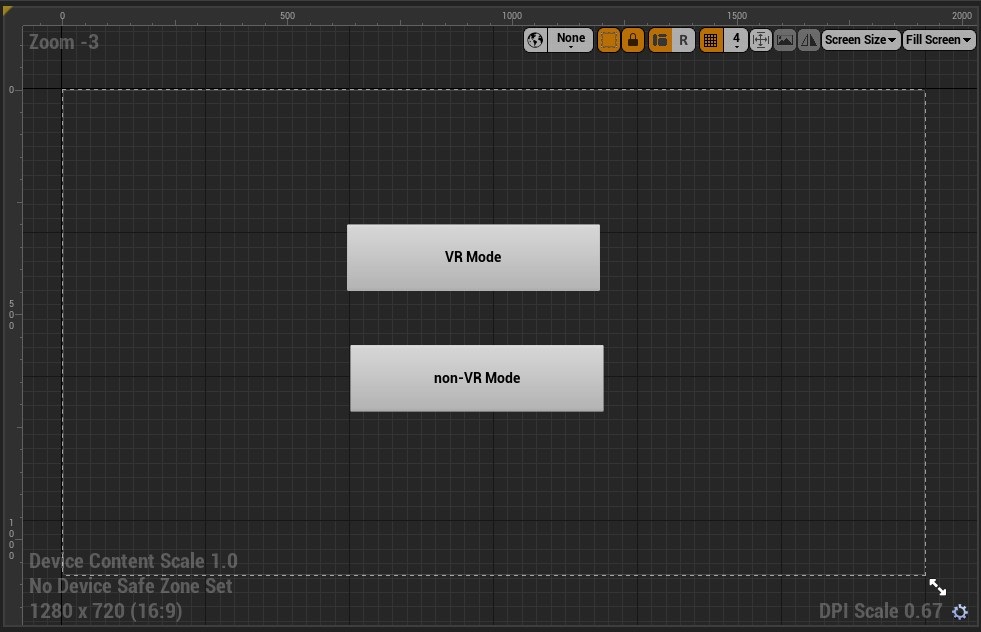
2. WB_MainMenu
A simple menu that gives the user a choice between VR and non-VR mode.
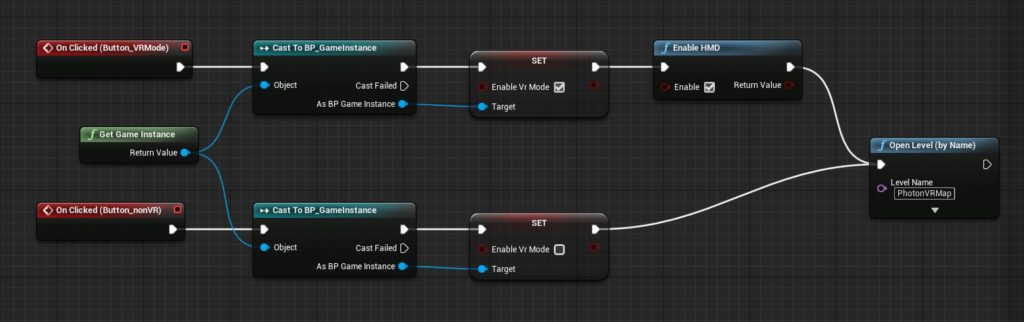
There is one thing to take note. I encountered a crash when I tried to switch to VR mode using the Enable HMD blueprint node right after opening a level (See error message below). The workaround is to trigger Enable HMD before opening a level as seen above in the widget blueprint.
Assertion failed: PipelineState.FrameState.predictedDisplayTime
OpenXRHMD.cpp [Line:2514]
3. BP_MenuGameMode
Create a new game mode. I added an Enable HMD false here to make sure the main menu does not start in VR mode.

4. BP_GameMode
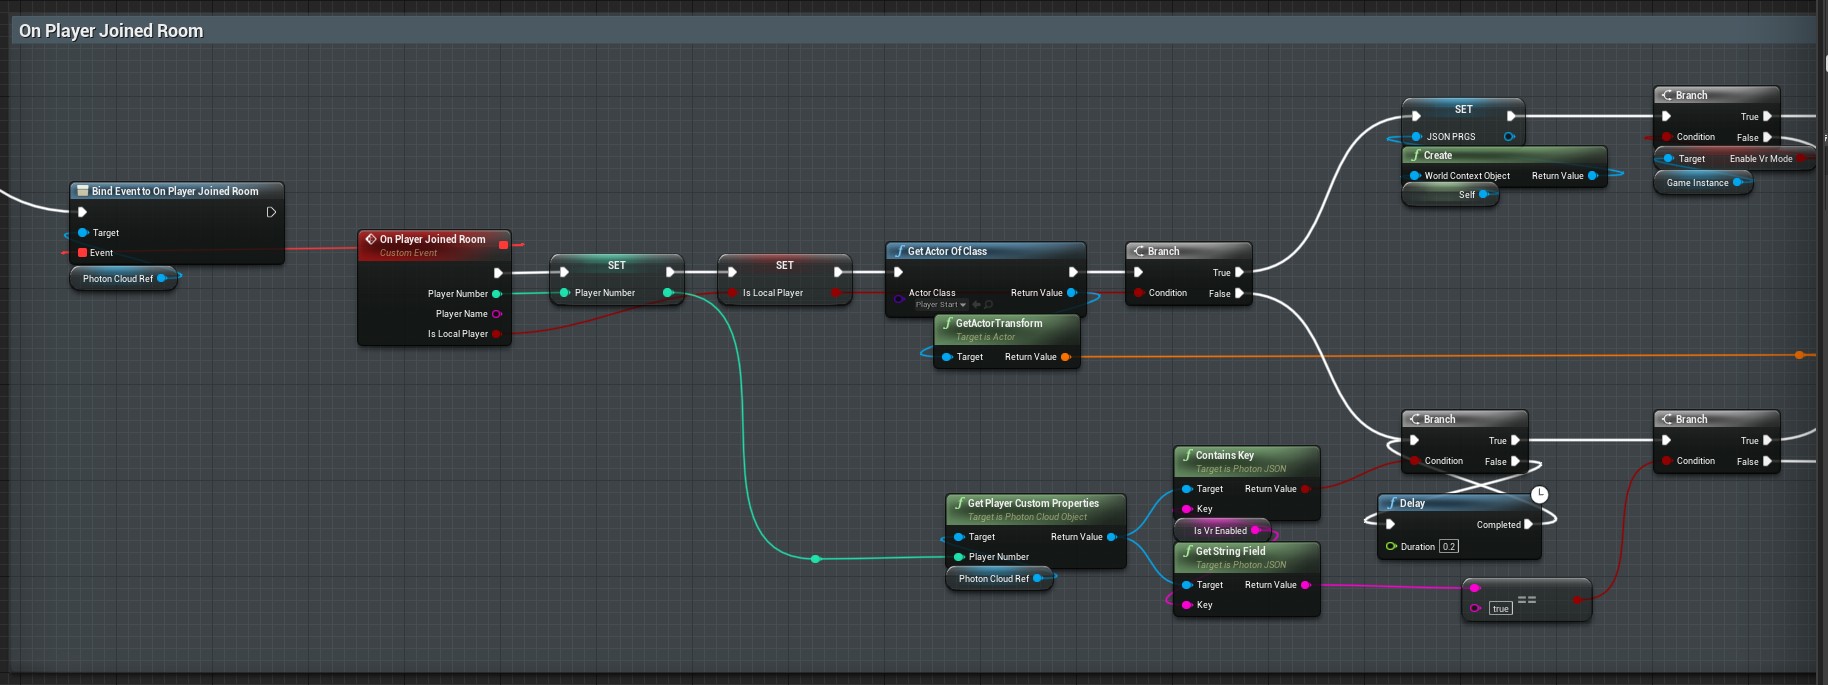
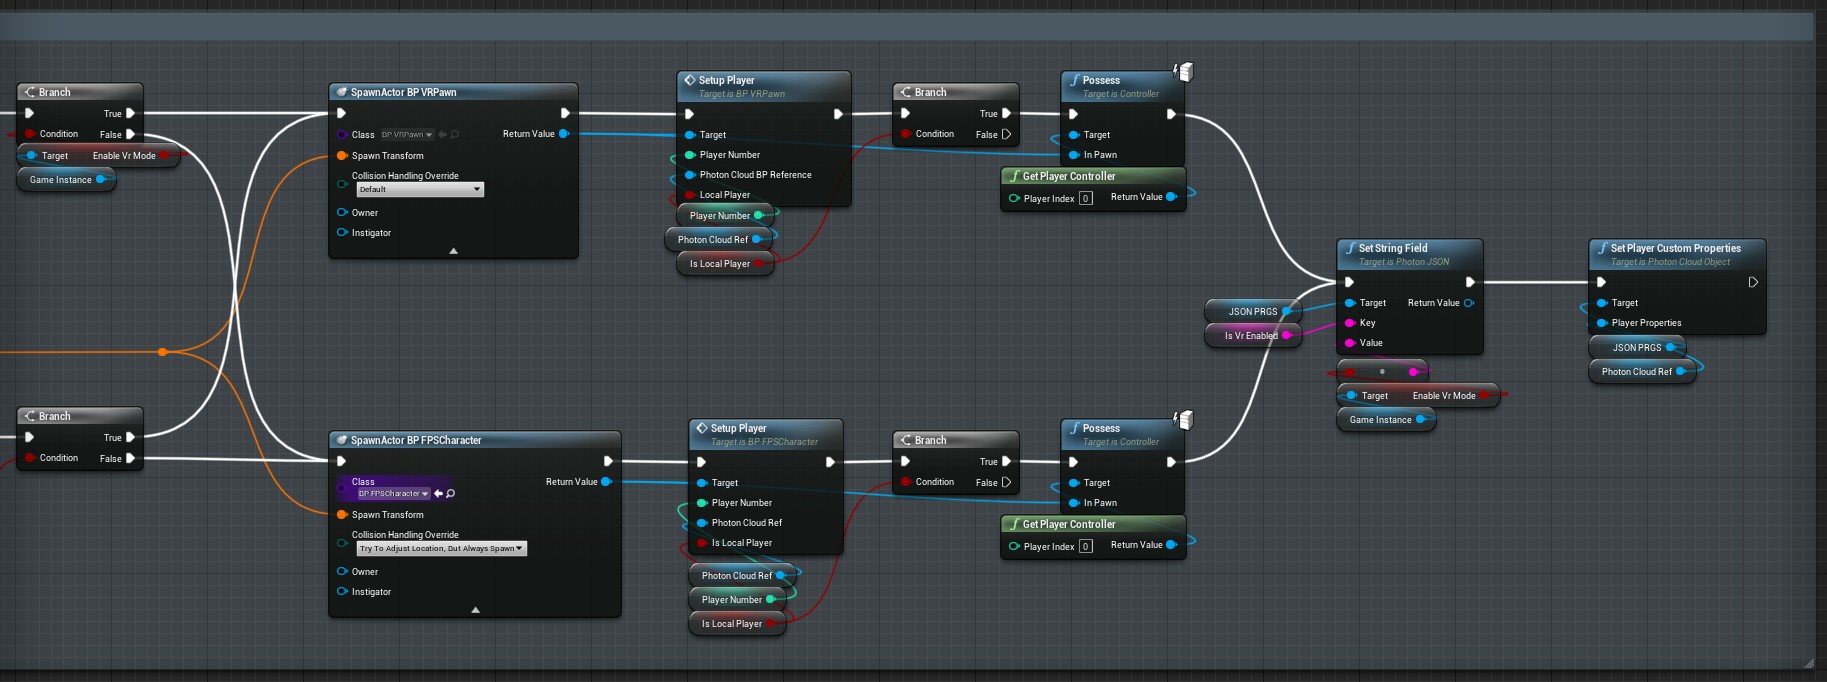
similar to the previous game mode. The difference is in the sequence for OnPlayerJoinedRoom.
- When a player joins the room, check if it’s a local or remote player.
- If local player, spawn and possess a VRPawn if VR mode is enabled, and spawn and possess an FPSCharacter otherwise. In both cases, we use a string IsVrEnabled with true/false value and set that as a Player Custom Property.
- If remote player, we get the player’s number and check if the Player Custom Property IsVrEnabled is equal to true. I added a Delay node here because sometimes the Photon JSON is still empty. You need to wait a bit and re-check the contents of the custom property. Afterwards, we spawn either a VRPawn or an FPSCharacter but do not possess them.
That’s all for now. There are other things to tackle such as movement interpolation and object interaction. Let’s leave those for another day.