Introduction
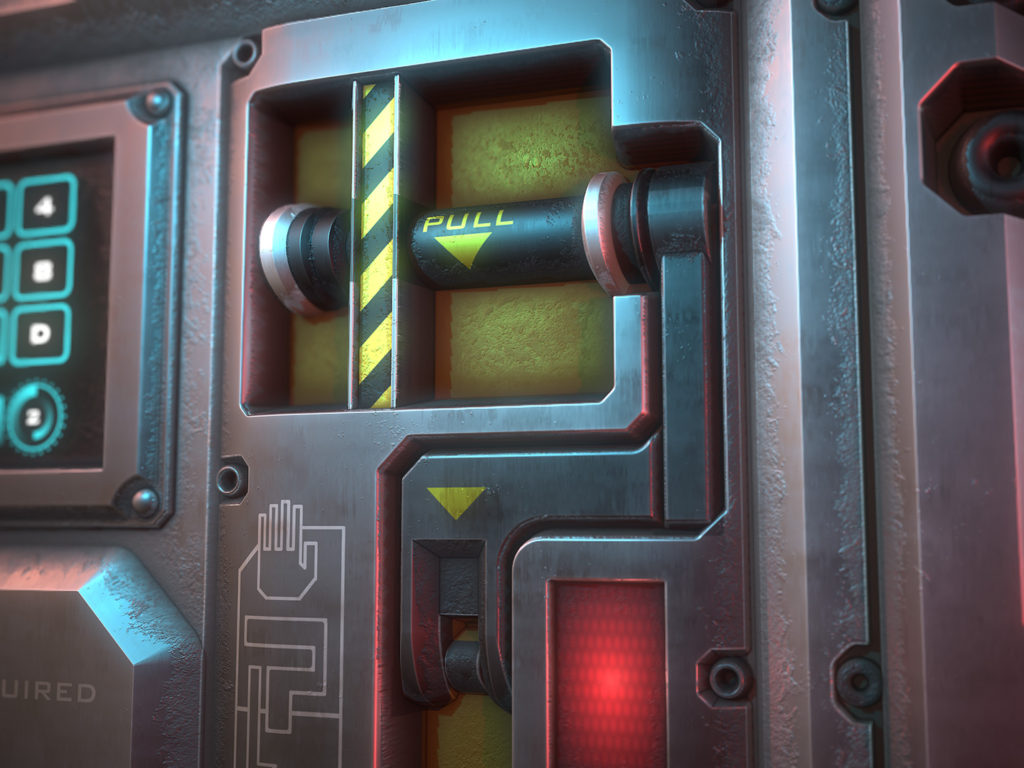
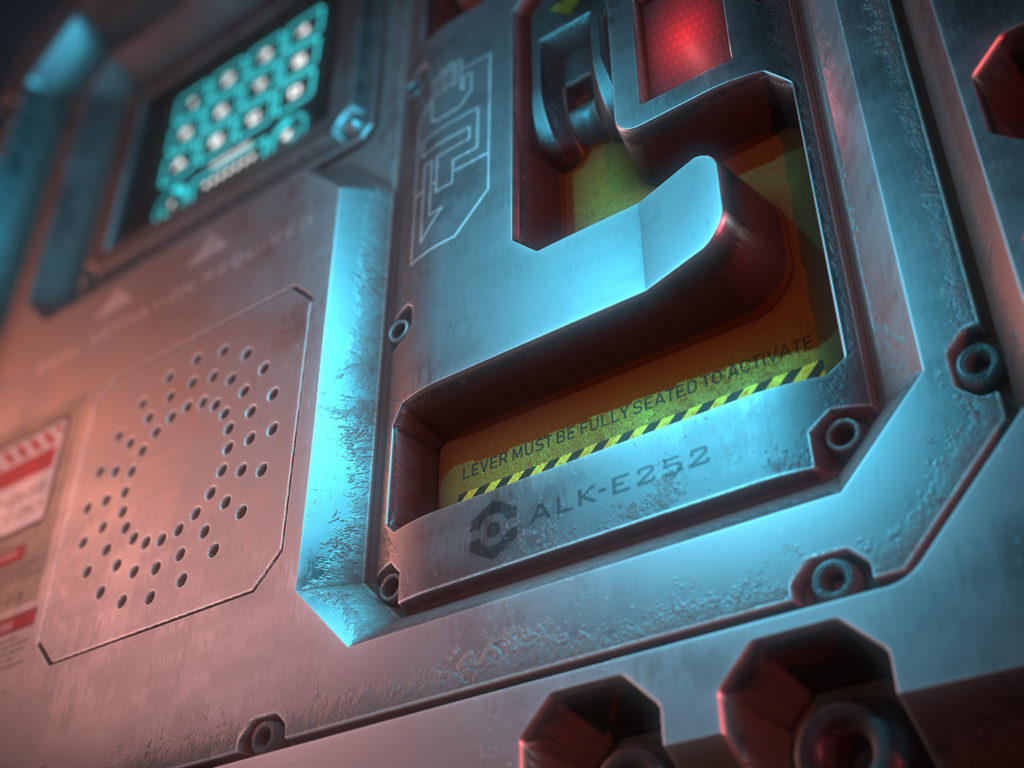
Seeing the widening adoption of Substance Designer for 3D artists, I decided to set aside some time to learn the software. Today, I’ll share with you the details on how I created the sci-fi control panel below, entirely in Substance Designer, rendered in Marmoset Toolbag.
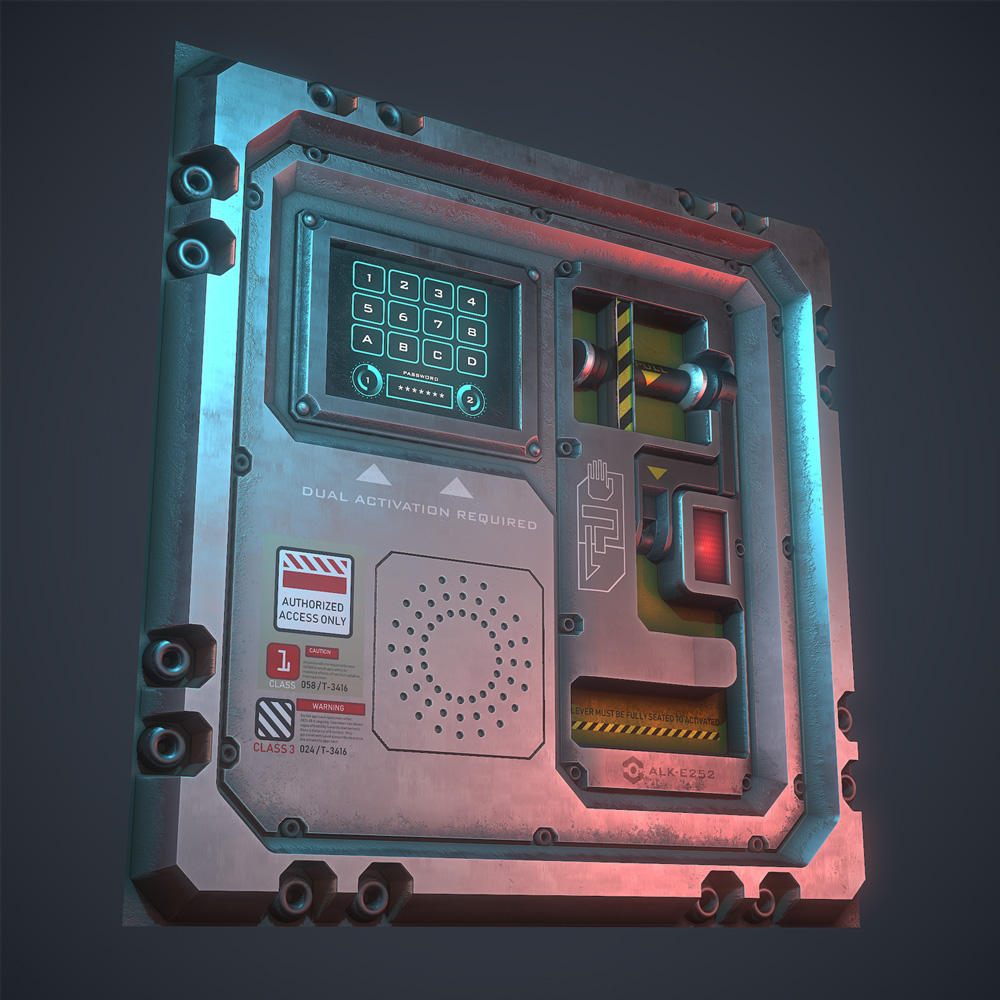
After watching Daniel Thiger’s tutorials on creating complex shapes and heightmaps, I wanted to test what I learned by making something related to sci-fi. Looking for a reference, I found a very interesting one which you can find in Jeremy Love’s portfolio for Alien Covenant. Seeing a lot of insets and bevels, this was a very good opportunity to stretch my skills in shape creation. The challenge was to create the reference 100% in Substance Designer.
Here is a screenshot of the graph:
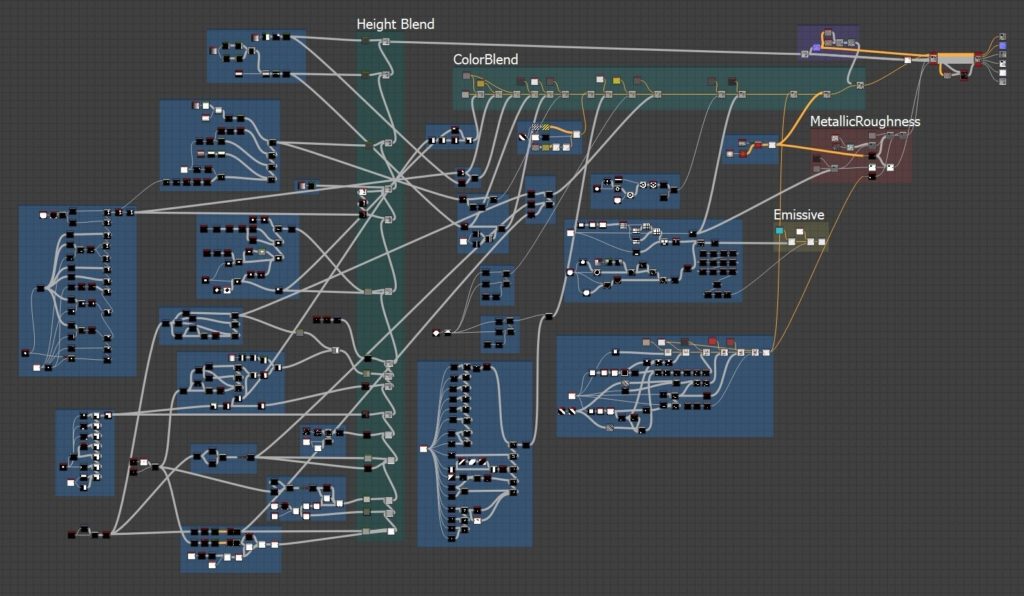
Which might look complicated at first glance, but if were to simplify it and show only the major connections, the graph would look something like this:
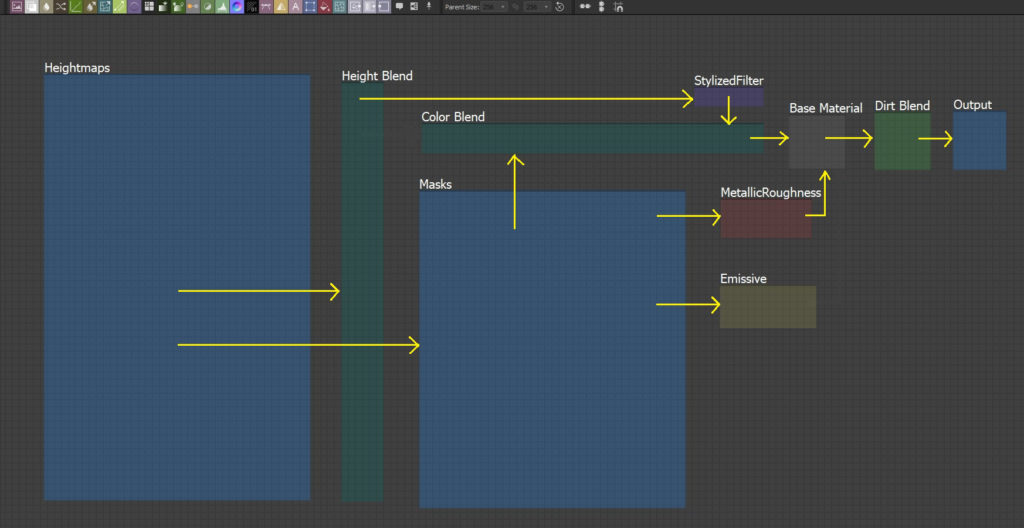
The graph can be summarized in the following steps:
I. Heightmaps
II. Masks and Textures
III. Color Blending
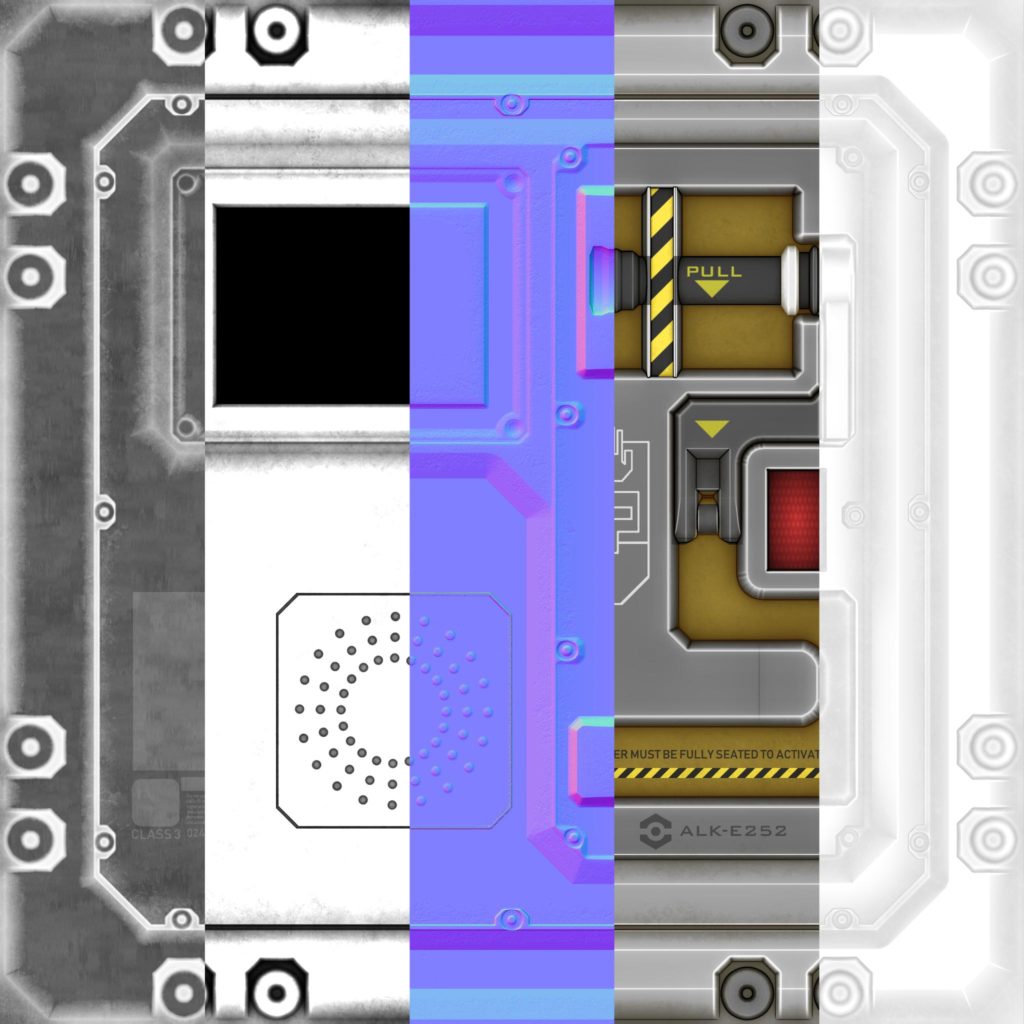
IV. Metallic, Roughness and Emissive Maps
V. Material Layering (Dirt)
I. Height Map
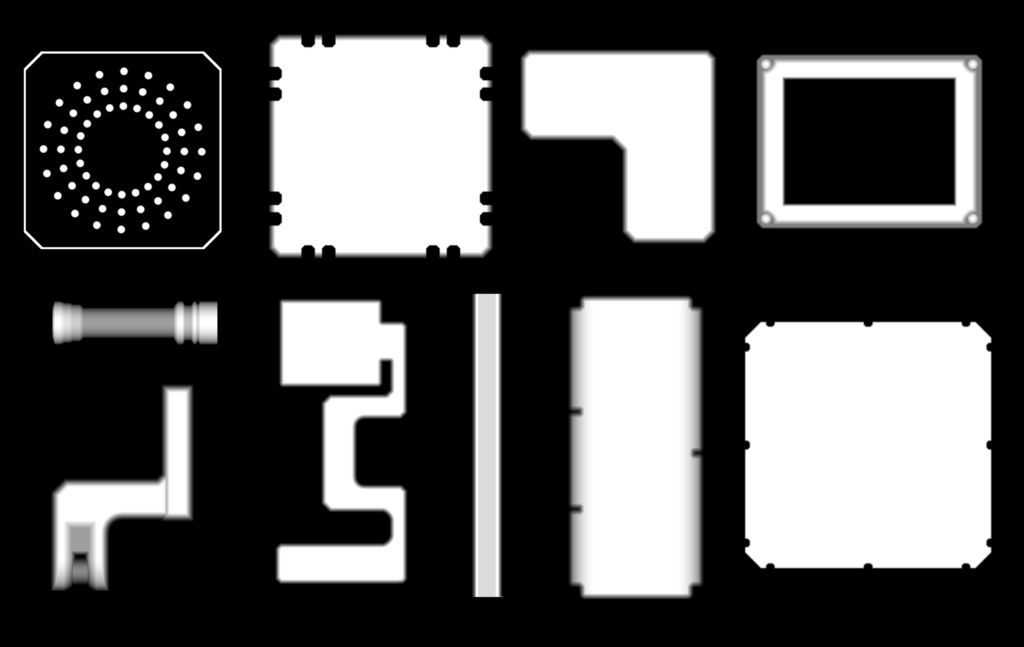
Creating the heightmap is the first step as this will drive other important maps such as the Normal, Ambient Occlusion, and Curvature Maps. We first plan ahead by disassembling the target shape into its smaller and simpler components.
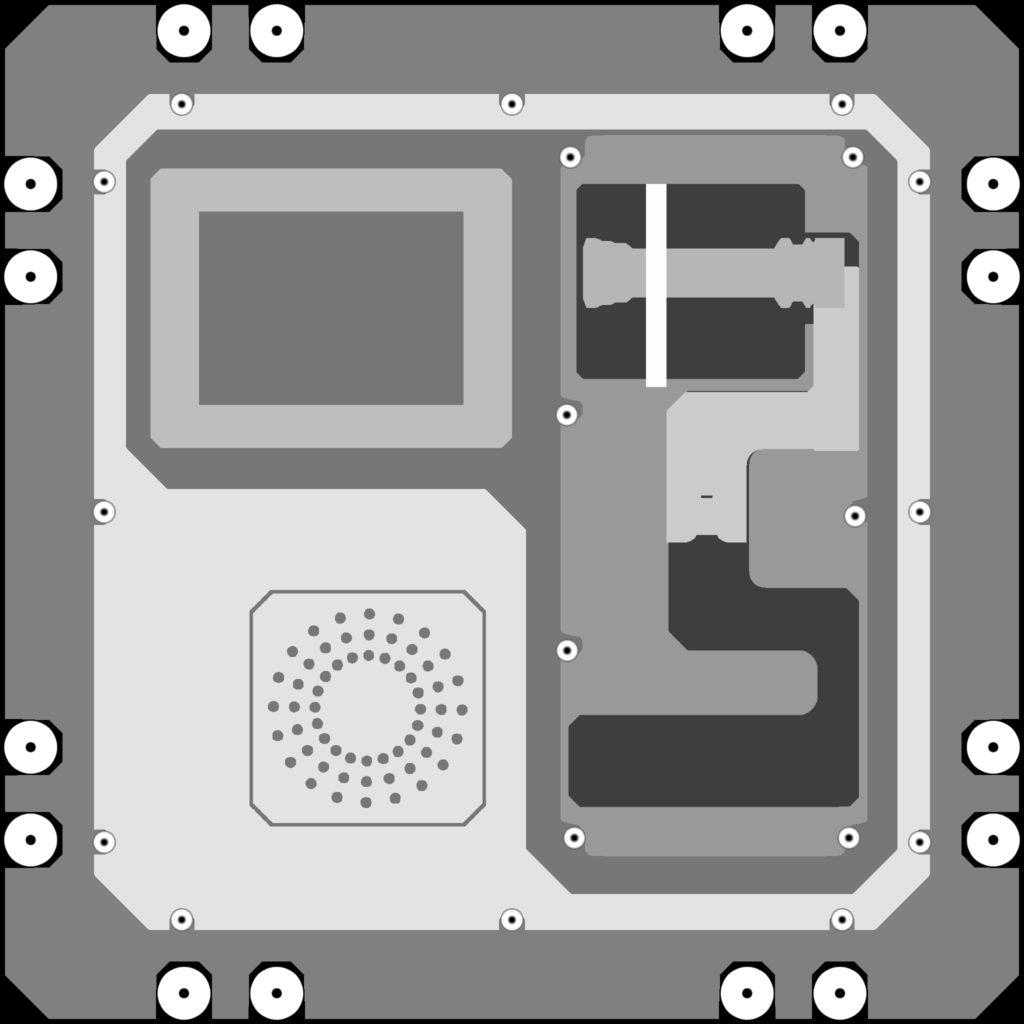
From here we can identify which parts we should do first and which parts are on top or below another. Each shape we individually create using a variety of nodes: Shape, Transform 2D, Symmetry, Bevel, Shape Splatter, Gradient, Curve, etc.
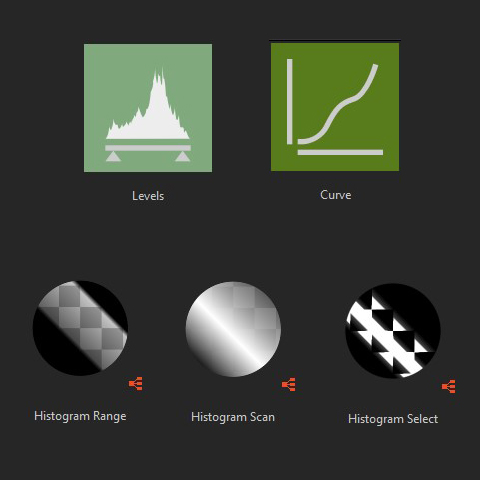
Next up, heightmap blending. To blend heightmaps, you often need to use Adjustment Nodes to make sure you are blending the proper grayscale values. The commonly used ones are shown below. It’s important that you know the difference and when to use each node. When in doubt, check out the Substance Designer Node References.
If you’re new to heightmap blending, I highly recommend that you check out Daniel Thiger’s Substance Designer Fundamentals 2. This pretty much taught me what nodes to use to create complex shapes.
The GIF below shows the sequence of the heightmap blending:

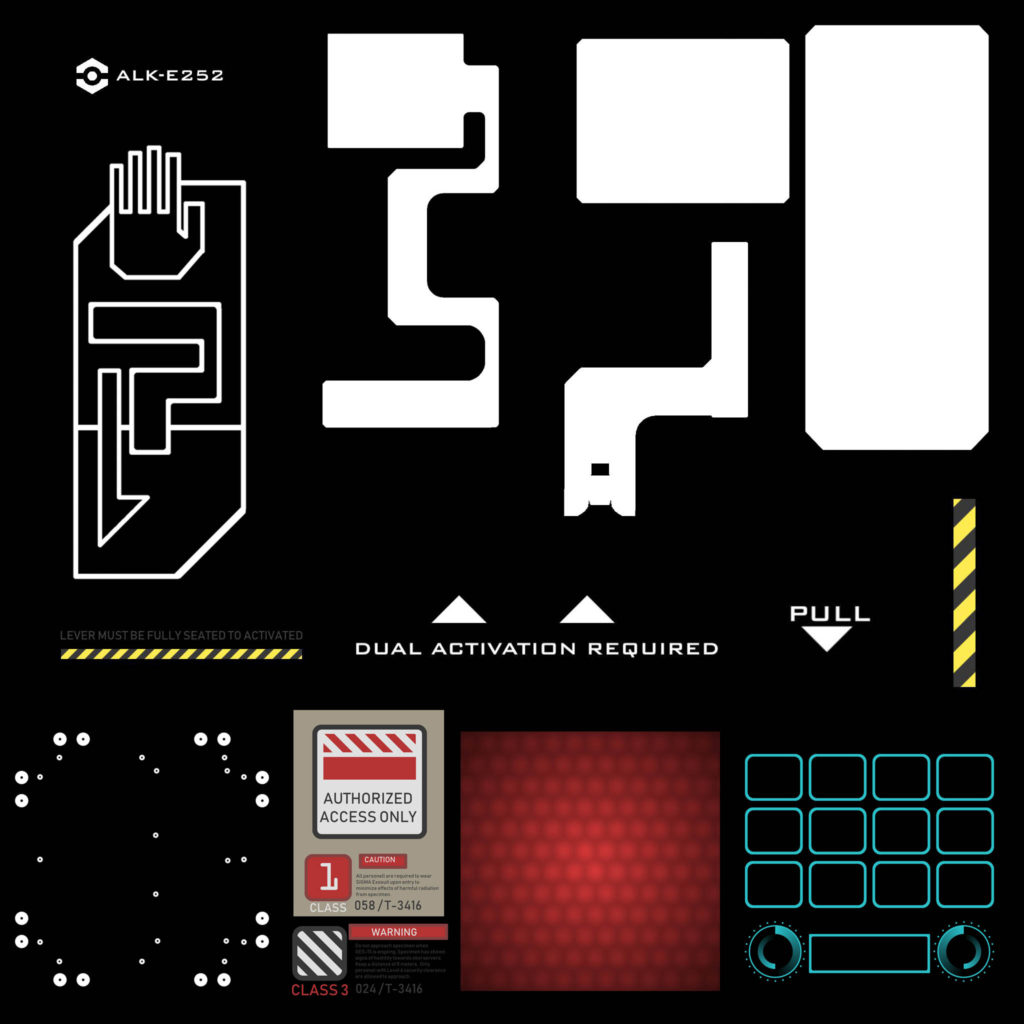
II. Masks and Textures
After creating the heightmap, we now reuse some of the nodes and create the Masks. These masks are used with pretty much everything else: colors, labels, textures, as well as the roughness, metallic, and emissive maps.
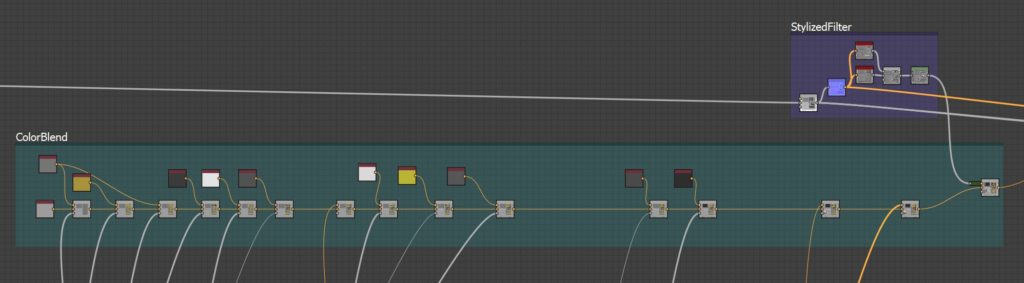
III. Color Blending

After the heightmap and the masks, you now have everything you need to blend everything together. From the graph below, you can see that I added a Stylized Filter, a quick way to make something look somewhat stylized.
IV. Metallic, Roughness and Emissive Maps
For the Metallic Map, I just masked out the areas that aren’t supposed to be metallic. For the Roughness Map, I used a Clouds 1 node as input for Directional Warp with a Directional Noise 2 driving the intensity. I do think that there’s room for improvement on this. If I had more time, I might do some more masking and variation along the different parts of the material.
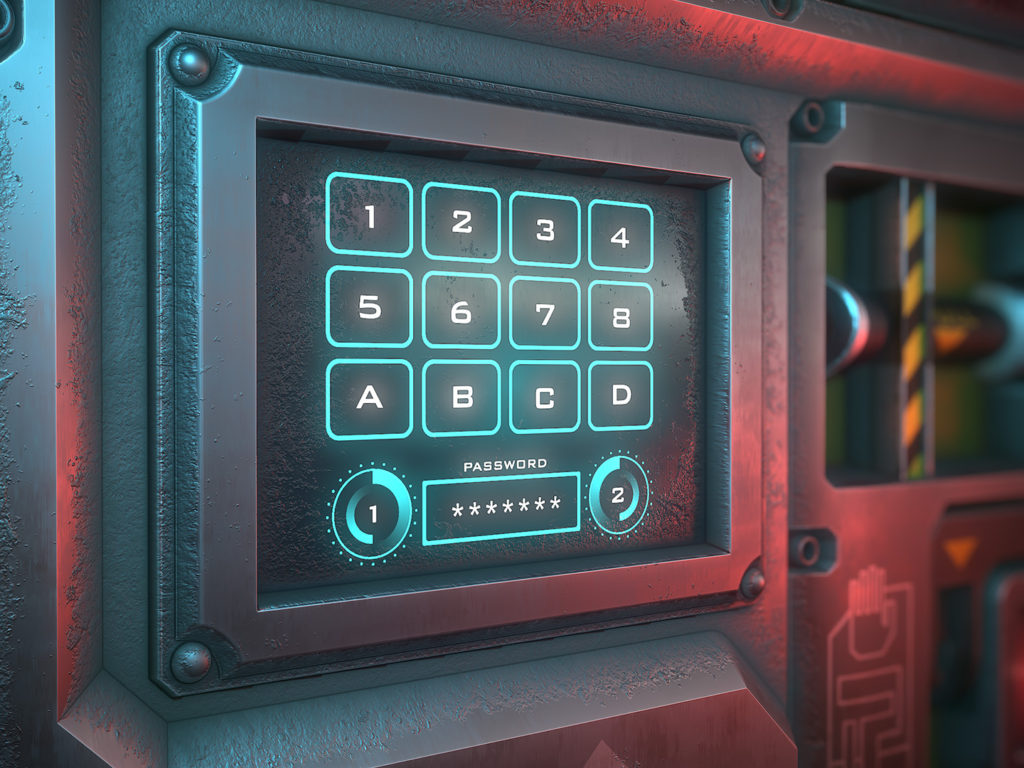
The Emissive Map, to be used for the monitor interface, is pretty straightforward since the masks have already been created. Just needed to add some color.

V. Material Layering (Dirt)
Finally, we connect all the previous maps (except the Emissive map) to the Base Material node.There’s a ton you can do with Material Layering such as adding wear, tear, damage, leaks, etc. For my case, I went for a simple Dirt generator. You can check out Allegorithmic’s Substance Designer Youtube tutorials to learn more about this topic.
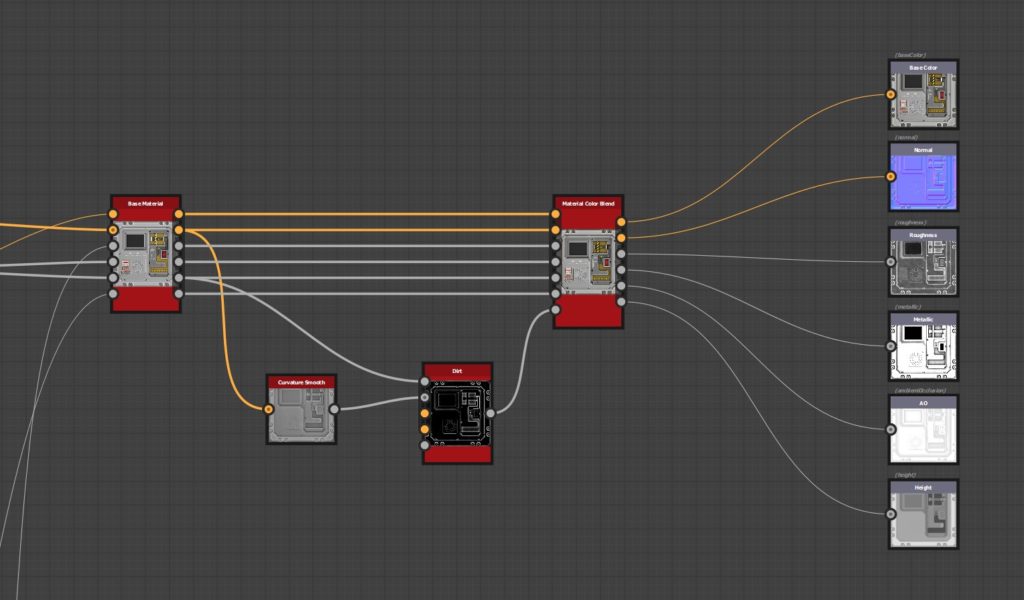
We finally arrive at the end and export the maps to be used according to your liking.
Conclusion
Overall, creating this material was a fun learning experience. Below are things I learned that you might find useful:
1. Avoid heightmap intersections if you can. One mistake I did here was that the edges of certain shapes and the shapes beside them were slightly intersecting. At first I thought it was perfectly fine to leave them like that because you can’t see it anyway. Later, it caused some issues when creating the color masks.
2. Optimize early. Allegorithmic has provided a Performance Optimization Guide which everyone should read.
3. You might run of of RAM when trying to compute 4K or 8K maps. If your computer cannot handle the load, there is still a way to output these maps by using Substance Player.
4. When your graph becomes too complex, create subgraphs to make your work easier.
Things to Improve
1. I should have created an environment that would be the backdrop/setting of this material.
2. The Roughness Map can still be improved by utilizing the masks and varying the roughness along certain sections of the material.
3. The Dirt applied can still be tweaked and improved.
4. The warning labels on the lower left somehow looks out-of-place. Might be good to add a little bit of grunge here.