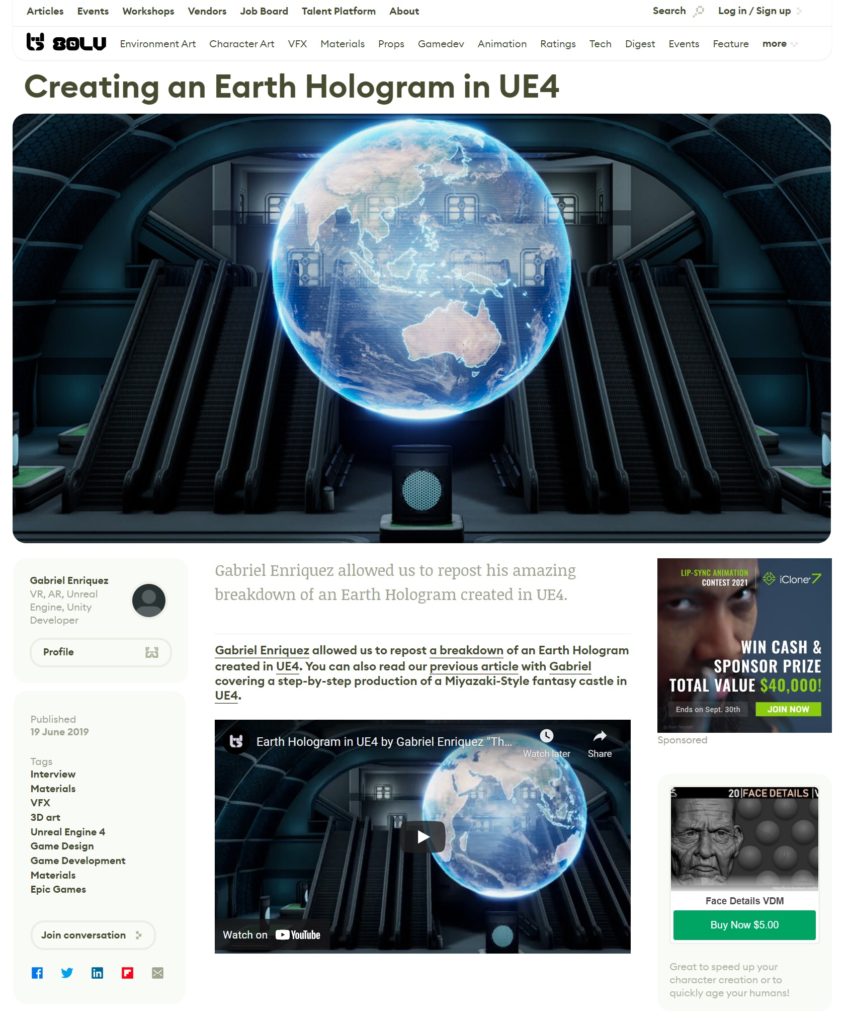
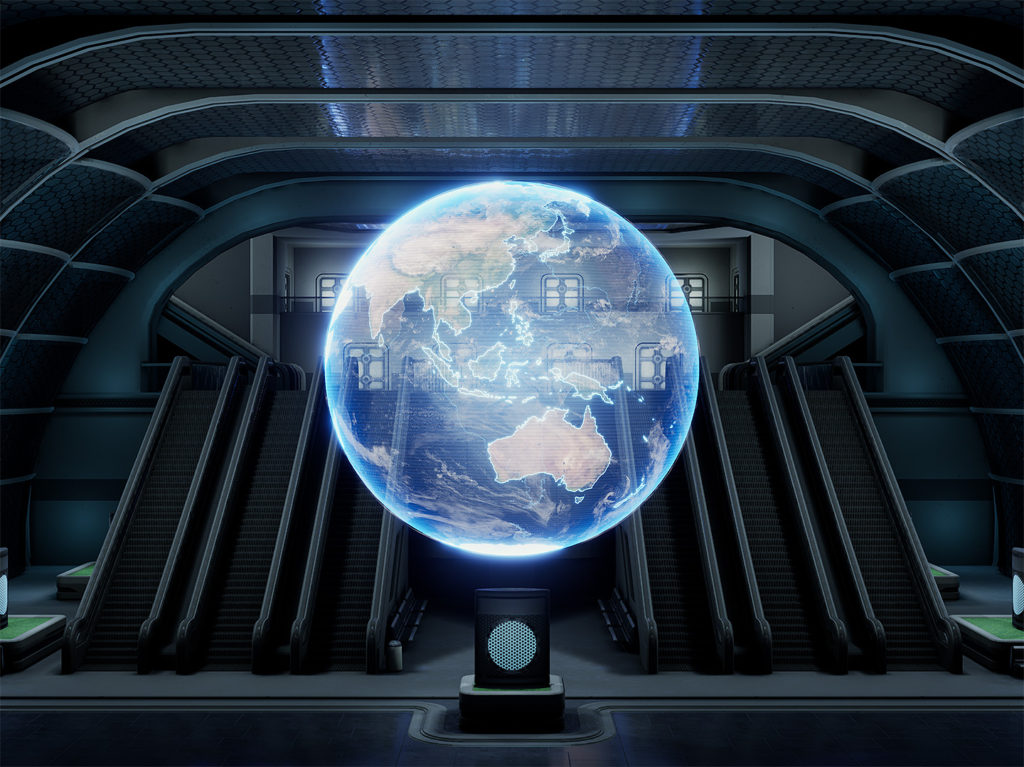
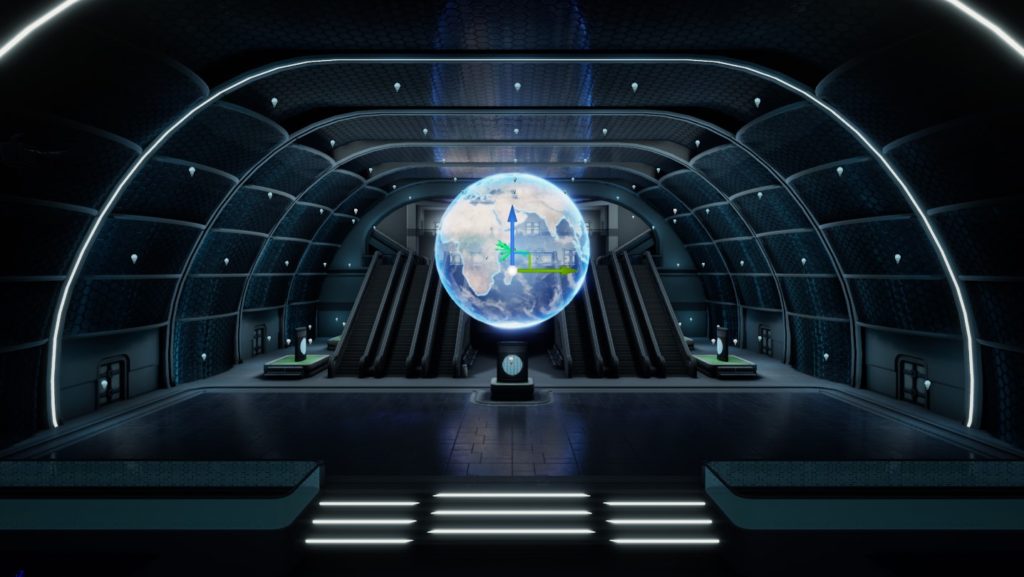
My goal was to learn more about materials and shaders in UE4 within a day or two. Looking for references, I stumbled upon an amazing artwork by Richard Rude which featured a holographic Earth. He also provided a detailed breakdown of his scene. This gave me the idea of making an Earth hologram as a way to study more about shaders. Below is the scene I ended up creating. I used the environment from the Shooter Game demo by Epic games as a background.
Let’s take a quick look on how the scene was made.
1. Earth Textures
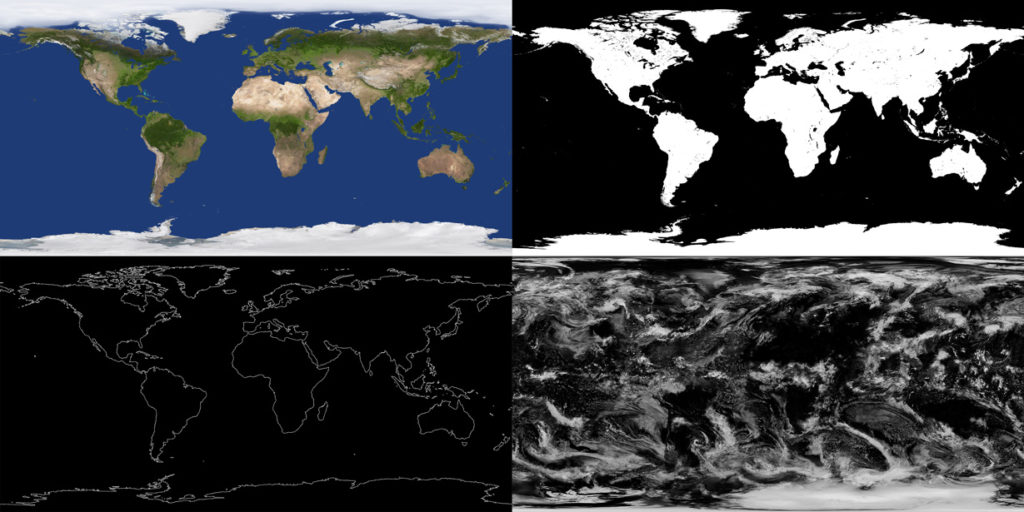
There are a lot of places where you can get Earth textures for free. In my case, I got them from Solar System Scope. I used 4 for this project: a Base Color, a Mask, an Outline (which I made in Photoshop), and a cloud texture. Another texture I used is a grayscale scan-line map (not shown here) which later you’ll see is vital in getting a hologram effect.
2. Creating the Earth Mesh
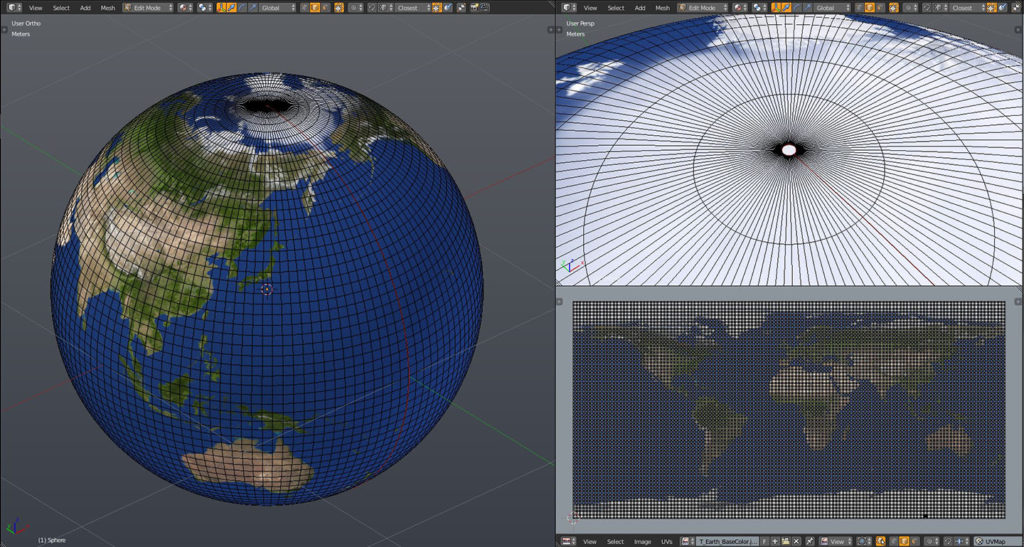
The sphere you create might depend on the textures you’re using. I think most of the Earth textures available online have a cylindrical map projection, or more specifically the Mercator projection. The sphere I used is the default available in most 3D modeling apps. Moreover, I increased the sphere’s density because I planned to take close-up shots.
An important note here is the way you UV unwrap the sphere. To get the best projection of the texture on the sphere, you need to make a small cap on both the top and the bottom poles of the mesh and then mark a seam along these caps as well as a straight line connecting them (the red line). Afterwards, you take the resulting UV island and align the faces along a rectangular distribution. Make sure to snap the edges to the texture’s borders.
3. Earth Hologram Shader
The shader I made is a modification of the hologram shader by Richard Rude. The material Blend Mode is set to Additive and the Shading Model to Unlit. Also, I turned on Two Sided because I wanted the back of the hologram to be slightly visible when looking from the front. Be careful not to make the back-face too intense because it can clutter the details on the front. Another notable feature is the panning scan lines which you can see more visibly in the material instance below. This makes the material feel more like a hologram. Additionally, I used the Outline texture to make the land borders more visible. Lastly, I made a quick multiply between the Earth black-and-white mask and the outer fresnel because I wanted the fresnel effect to be less intense on the oceans than on the landmasses.
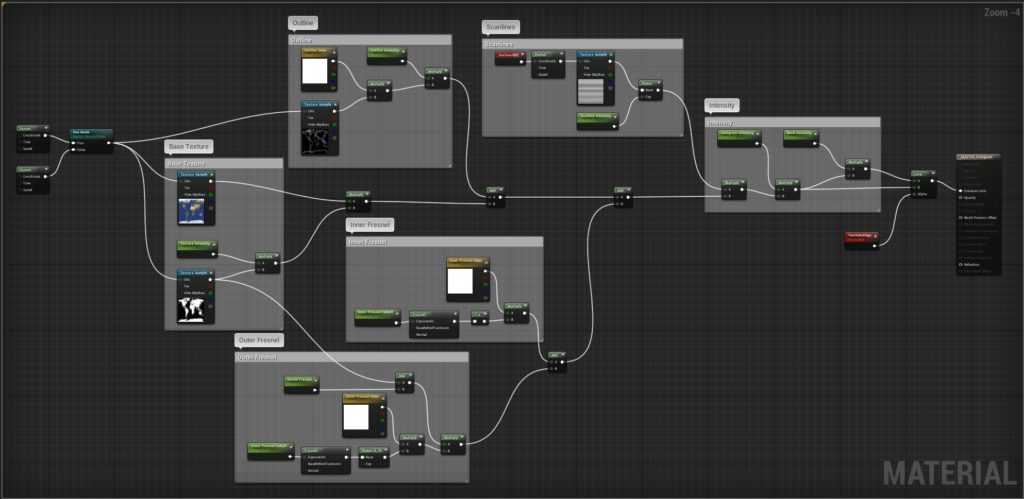
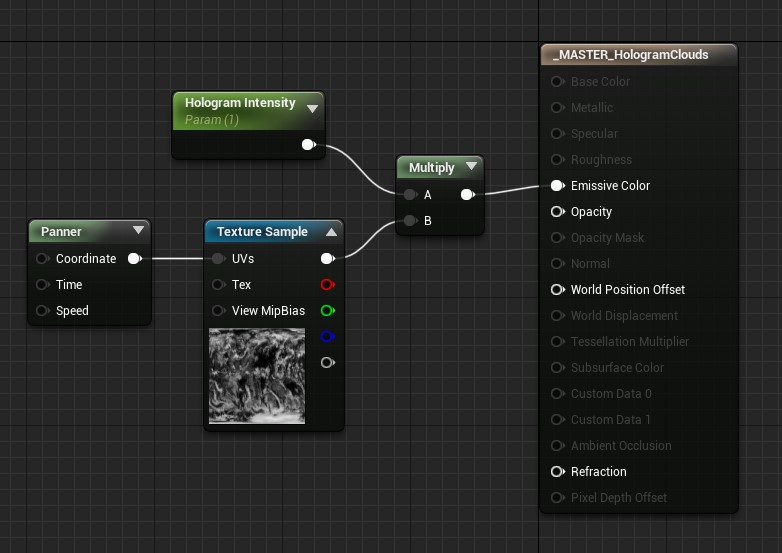
For the clouds, I used a slightly larger sphere on top of the Earth mesh. The material setup is very simple. You can actually combine this into the primary material above to make just one hologram material.
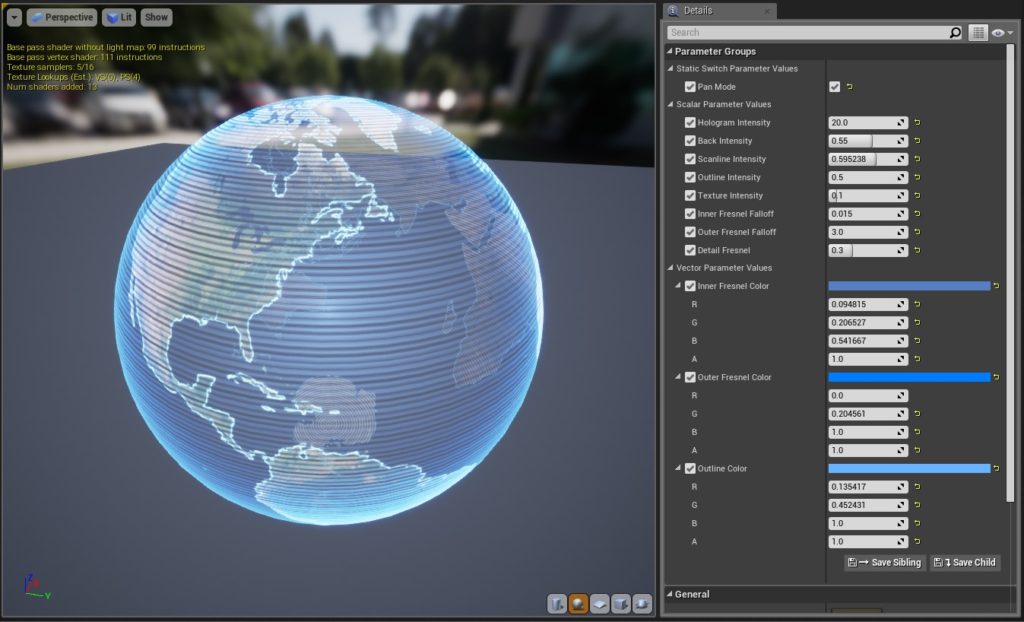
Below you can see the parameters I exposed to achieve creative control on how the hologram should look. The scan lines are clearly visible.
4. The Environment
To make a quick scene to showcase the Earth hologram, I used the lobby section of the Shooter Game demo from Epic Games. I removed all the background assets and lights until I was left with only the lobby.
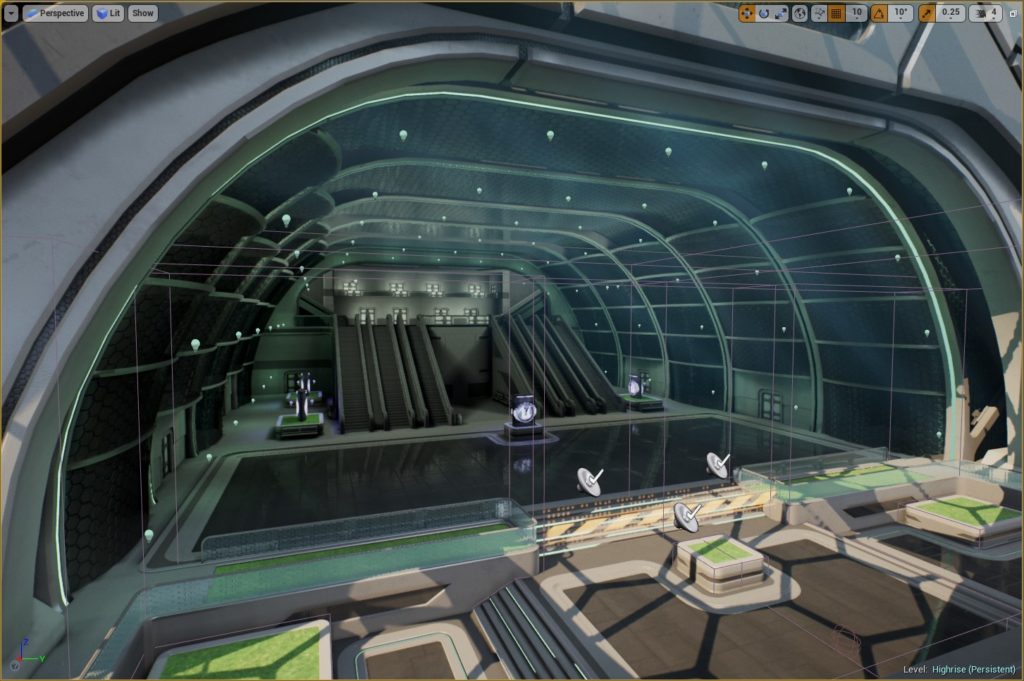
5. Lighting and Post-Processing
I played a lot with the colors and was originally aiming for a color scheme that shows contrasts between warm and cool tones. That didn’t work out, so I decided to use a blue-green background which you often see in sci-fi scenes. I switched all the lights to static and carefully balanced them with Bloom and Screen Space Reflections. There was a lot of back-and-forth with the hologram and post-processing parameters until I was satisfied.
And there you have it!
80 Level Article
Huge thanks to 80 Level for feature this! Check it out here.